BasecodeCSE167F11
Contents |
Base Code for Programming Projects
The purpose of this web page is to introduce OpenGL programming and set up your computer so that you can begin developing OpenGL applications.
In order to display an image, you must create some sort of drawing canvas. In modern operating systems, the basic drawing canvas is a window. With OpenGL, you create a window and then create an OpenGL drawing context associated with that window, which allows you to use your video hardware to draw 3D objects directly into that window. Opening that window and creating the OpenGL context is cumbersome and varies from system to system. The purpose of GLUT is to simplify and unify this initial step.
On this web page we will show you how to download and install GLUT and configure Visual Studio to use it. After that we will compile and run a sample program to test that everything is working. You can follow these same instructions if you would like to install GLUT on your home computer to work on the homework projects.
Compiling Instructions - Visual Studio on Windows
-
Installing GLUT - OpenGL Utility Toolkit.
GLUT is available from [1]. Make a folder called c:\glut and download the glut-3.6.7-bin.zip (not glut-3.6.7-src.zip) to that folder. Open c:\glut and right click on glut-3.6.7-bin.zip and select Extract Here. Open the new folder (glut-3.6.7-bin) and verify that you see the following 5 files:- glut.def
- glut.h
- glut32.dll
- glut32.lib
- README-win32.txt
glut32.dll is the compiled code which handles all of the GLUT functions.
glut.h is the header file which lists all of the GLUT functions. This must be included in any source code that uses GLUT (possibly several files in a multi-file program).
glut32.lib is a library file which must be linked with your program so that it knows how to use glut32.dll.
Go back to c:\glut and make these 2 folders: c:\glut\include\GL and c:\glut\lib. Copy glut.h into c:\glut\include\GL and copy glut32.lib into c:\glut\lib.
Normally we would put glut32.dll in c:\windows\system32 (or c:\winnt\system32) so that all programs would have access to it. However, we do not have access to do this in the lab, so I will show you a work around after we build our first program.
-
Configuring Microsoft Visual Studio
In order to use glut.h and glut32.lib we must tell Visual Studio where these files reside.- From the Tools menu, select Options.
- In Visual Studio 6, select the "Directories" tab or in Visual Studio .NET select "Projects" and then "VC++ Directories" from the left side.
- Select "Include Files" from the pull down menu on the right side. Add "c:\glut\include".
- Select "Library Files" from the pull down menu on the right side. Add "c:\glut\lib".
- Press the OK button. Visual Studio is now configured.
-
Your first OpenGL program
From Visual Studio, create a new Project. There are several different types to choose from, but the one we want is Win32 Console Project (VS 6.0), or Win32 Project (VS .NET). If you were going to create the window and OpenGL context yourself, you would use a normal Win32 project, but since we're using GLUT, we want the console project. Pick a convenient location for the project, and give it a name (such as Lab1), then press OK (figure 1).</P>Figure 1 - New Project 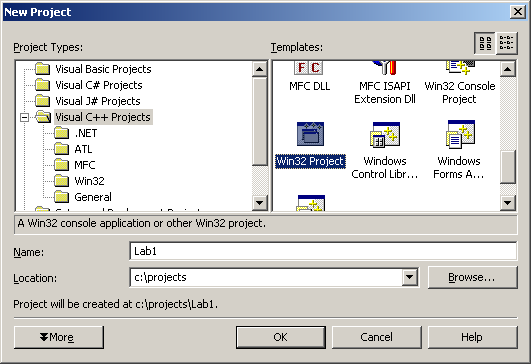
If you're using Visual Studio 6, select Empty Project. If you're using Visual Studio .NET, select Application Settings on the left, then make the following settings (figure 2):
- Application type: Console Application
- Add support for: uncheck all
- Additional Options: Empty Project
Figure 2 - Application Settings 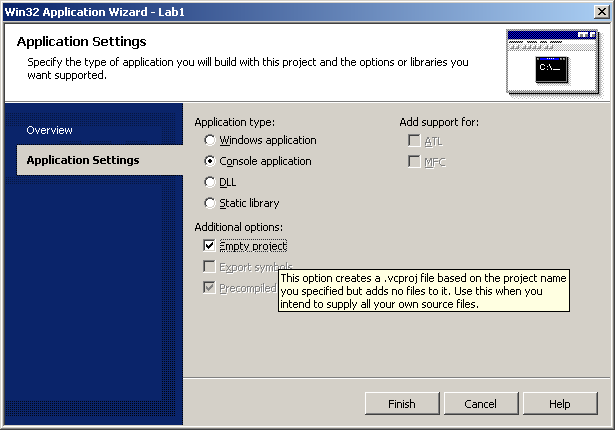
Once the project is created, download quad.cpp or cube.zip and add it to your project. Cube comes with a Visual C++ 2005 solution file, as well as a Windows executable to demonstrate what it should look like. If you compile your program and get link errors, it is because you are missing the following libraries: glut32.lib, opengl32.lib, and glu32.lib. To add them, go to Project->Settings, and click on Linker, Input on the left hand side (VS .NET) or the link tab (VS 6.0). Under additional dependencies (VS .NET) or Object/library modules (VS 6.0), add opengl32.lib glut32.lib glu32.lib (figure 3). Now it should compile.
Figure 3 - Additional Dependencies 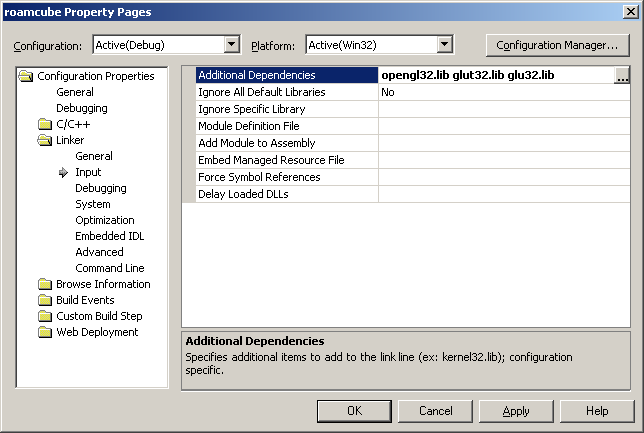
In order for your program to run, it needs access to glut32.dll. One way to do this is to put glut32.dll in the \system or \system32 path. In a lab environment like this one, you do not have access to these folders, so there is another method. Go back to c:\glut and make the folder c:\glut\bin. Copy glut32.dll into c:\glut\bin. Now minimize to your desktop.
- Right click on My Computer and select Properties.
- Click on the Advanced tab and select Environmental Variables
- In the top box (User variables for...) edit Path (or creat it if it does not already exist). Add c:\glut\bin to the path. This will now look for dll dependencies in c:\glut\bin so your program can load glut32.dll. Now execute your program, you should see a red square!
- Note:* Make sure that you save your code files on the network drive, not on the local C: drive. You won't be able to access files you put on the C: drive the next time you log on to a (different) lab computer.
- Installing GLUT - OpenGL Utility Toolkit. GLUT is already installed on the Linux lab machines in EBU3B. Therefore, no configuring is required; just use this Makefile, which points to the necessary header and library files you need to compile. Hooray!
- Compiling using the Makfile
Download the attached Makefile onto your machine and put it in the same directory as the triangle.cpp file. To compile, type "make". The compiler will generate an executable named "triangle" in the same directory. The Makefile combines all the .cpp files in the current directory, so if you add more .cpp files later, they will be included. - Type ./triangle to execute the program. You should see a red triangle!
</OL>
Compiling Instructions - Linux (Lab) / MacOSX
Setup Instructions for Mac OSX
Aaron Schwartz is sharing his notes on the OpenGL setup in OSX on his blog: OpenGL Setup for OSX.
Janelle Shane was kind enough to share her notes on the setup in XCode here.
Thanks, Janelle and Aaron!


