CSE167FinalProjectF12
Rock Harden (Ken Dang, Jeff Coonen, Thomas Gray)
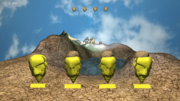
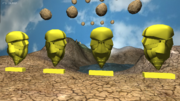
The game Rock Harden is a minigame within Pokemon Stadium -- another game, originally designed for the Nintendo 64. The purpose of the game is to survive the longest as rocks are launched at your Kakuna and you brace yourself against them.
About The Game
In the game Rock Harden, players are cacoon-like creatures from Pokemom called Kakunas that only know one skill -- how to harden themselves into a protective state, sheilding themselves from danger. Rocks are launched at a trajectory such that they temporarily go above the field of view, only allowing the user to see them momentarily. The player's health bar is decreased when the creatures are not protected by their harden skill when a rock hits them. The harden skill isn't free, however; your health is slowly drained while you use this skill. The user's goal is to use their harden skill for the least amount of time possible and the winner is the last Kakuna standing!
The game was designed using a few different API's:
- SDL: We used SDL to help abstract the process of accepting input from multiple Logitech Dualshock controllers so each player can control their Kakuna separately on their own controller. Additionally, we use this API to play various music files and other sound effects in the game.
- SOIL: Simple OpenGL Image Library, or SOIL for short, is an API for handling various image file types and loads them into memory for proper use with OpenGL. We used this for loading in all our PNG files; it was a great help in early attempts to load in PNG files with transparent parts to it.
For a list of controls and a brief overview of how to play, navigate to the How To Play section of the website. Input to this program was specifically designed for use with Logitech Dualshock controllers, however other USB joysticks/gamepads will work with SDL as well.
Technical Features
- Per-Pixel Shading
- Basic collision detection of rocks and players
- Calculating flight-patterns/trajectories for rocks with Bezier curves
- Explosion particle effect upon impact
- Environment Mapping for Kakunas when they harden
How To Play Rock Harden
In Rock Harden, you are a caccoon-like creature from the world of Pokemon called a Kakuna (shown left). You must use Kakuna's harden skill to protect yourself against the volleys of incoming rocks so you can live the longest and win! There are two ways you can lose health in this game:
1. A direct hit from a rock: this results in losing a significant amount of health.
2. By using your harden skill: while you use this skill your health will slowly decrease.
To use your Kakuna's harden skill, simply press and hold button 2 on the controller for the duration you wish to use the skill. To pause the game, hit button 10 (the right of the two smaller buttons in the center). Once in the menu, you can navigate through it by using the left directional pad and/or the left analog joystick.
Additional commands
| Name of Feature | Command |
|---|---|
| Toggle per-pixel shading | 'P' |
| Environment mapping | Button 2 |
| Quit | ESC |
| Go forward | 'W' |
| Strafe left | 'A' |
| Go backward | 'S' |
| Strafe right | 'D' |
| Move faster | SHIFT |
| Rotate scene | LEFT MOUSE |
The super-simplified adventure of Hansel and Gretel (Marcel Dall'Agnol, Danilo Gasques, Julaiti Alafate)
Background Story
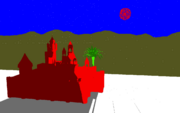
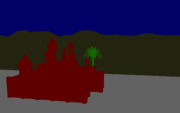
This is a super simplified version the well-known story of Hansel and Gretel. The young children of a poor woodcutter were taken into the woods by their abusive mother and left there. They walked for a long time and finally got lost in the scary forest. All of a sudden, they saw a beautiful candy house at the front of them. It was so unreal and nobody know what was inside. They still got close to it because they had no other choice.
Project Description
The project demonstrates part of the classic children story in a first-person view point. The player need to control the moving of the character in the forest using keyboard until they arrive the candy house.
Technical Features
- Procedurally generated plants (for generating the woods)
- Procedurally generated terrain (for generating the surrounding environment at far away)
- Environment mapping (for making the river reflecting the surrounding trees)
- Toon-shading (for rendering the candy house to make it more cartoon-like)
We spent our creative efforts into making the process of lost kids walking in a scary woods as convincing as possible. We built a silent forest using strange trees, river and terrain at very far away. At the end of the woods, the cartoon-like, cute house looks so unreal beyond the dark forest, indicating that what happen after the player step into the candy house will be more terrible.
Implementation
The story is divided into 3 scenes (which are rendered completely separate, somewhat as a state machine). The entire story will be seen in first person, walking normally. First, the character is outside their own house, going towards the forest. This is shown by a cartoon picture. Then, once they enter the forest, the idea is that they should walk beside a river, which will lead them to the final scene. If the character diverts, they should retrace their steps or otherwise be lost in the woods. Finally, the climax of the story is when they see the house made of candy, which will be rendered with the toon-shader to yield a more childlike scene.
We divided the implementation of the technical points into three parts, finished them individually and merged them together later.
Experience Talk
We implemented toon shading using GLSL. There are two important parts of a successful toon shader: one is painting the shadow and highlights discretely but not merge them in a smoothly way, and the other is drawing the outline of the object. The shader works in two passes. First, it uses a 1D texture to change highlights and shadows discretely. Note that we only need to specify the position of the light but not need to enable the light in the application. Second, it calculates the angle between the view direction and the normal of the vertex. If the angle is around 90 degrees, then by drawing the fragment in black, we can get the outline of the object.
The last thing we need to mention is that remember to normalize the vectors. We made this mistake at the beginning and keep getting the wrong angle value.
Space Stealth Smuggler (Kevin Crossan, Rafael Nevarez)
Story
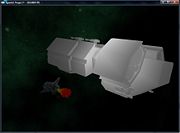
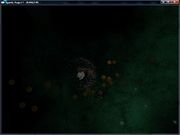
You are a rookie space pirate that has decided to take part in a high-stakes smuggling operation that's taking place right under the noses of the local space authority. There is a treasure quota that must be met in order to have enough money for rent, food, and laundry. The player launches from the mothership that is surrounded by a nebula. They then must collect treasure from the system, avoiding contact with police.
Technical Features
Keyboard Functionality
- 'w' = accelerate forward
- 's' = decelerate backwards
- 'a' = turn camera left
- 'd' = turn camera right
- 'p' = change to playing mode
- 'd' = change to display mode
Mouse Functionality
- Mouse movement changes orientation
- Button 1 to accelerate
- Button 2 to decelerate
Camera Modes
- Display Mode (display entire system and use standard translate, rotate, and zoom controls)
- Play Mode (camera follows space ship)
- First person mode (view from cockpit)
- Third person mode (view back of spaceship)
- Reverse third person mode (view front of spaceship)
Rendering Effects
- Particle Effect (2)
- Shadow Mapping (3)
- Collision detection (bounding sphere) (1)
Effect Applications
- Particle Effect
- Flame behind engines of ship
- Asteroid fields
- Golden treasure particles around loot
- Nebulas
- Shadow Mapping
- Police not able to detect player behind planets
- Shadows of objects
- Collision detection
- Asteroids colliding and exploding on contact
- Player ship exploding on asteroid/planet/police contact
- bounding box of area that player cannot leave
- Skybox
Optional Features
- General gameplay
- Once all the necessary treasure amount is obtained, player must return to the mothership.
- Make sure to avoid objects in the vast area of space since the shield generator cannot sustain much damage.
- Stealth gameplay
- Hide behind planets and in nebulas
- Power down your ship to avoid detection
- Drift from location to location to prevent engine signature tracking
- Avoid meteors/asteroids
- Newtonian space physics
- Accelerate/decelerate to a certain speed and remain at that speed
- Allows drifting
- Makes controlling ship more difficult
- HUD
- Number of obtained treasures in respect to necessary amount needed to complete task.
- Nearest target direction
- Heat source percentage used/emits
- Using acceleration button duration to find the percentage
- Shield percentage
- Gravity
- Planets to ships
- Planets to meteors/asteroids
Solar System Design
The solar system will have a nebula and an asteroid field. At least one planet will be in the solar system. The system will be designed so that it is possible to hide behind planets and within nebulas from the sensors of the police while collecting the treasure. In addition, the location of the treasure will be placed such that a moderate amount of traveling around the system is required to collect all of the treasure.
Strawberry Field Under Fire! (Miguel Paysan, Alvin Bundalian)
Brief Summary
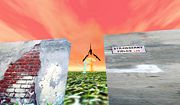
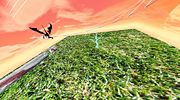
This project utilizes what we have learned throughout the quarter in CSE 167. The developers are Alvin Bundalian and Miguel Paysan. As you can see our project consists of a fire breathing dragon flying around a scene causing havoc.
Developers
Miguel: Heyoo, my name is Miguel. I like Game of Thrones (books), the Beatles, and women of all kinds. I hope to pursue a career in video game development or design. Cuz i'm artsy fartsy like dat. This class has been the most helpful and favorite class I've ever taken in my life. One of the highlights of my life was blacking out on 3 Liters of delicious Hofbrau Beer at Oktoberfest last summer.
Alvin: Hi, I'm Alvin, I like playing basketball, playing video games, drawing, long walk on the beach, skipping through strawberry fields, and lastly, I love pulling all-nighters every day during finals week because it stresses me out and I get big knots on my back that never seem to go away. With that said, I would like to say that CSE 167 is by far the best CS class I've ever taken here in UCSD. The projects are a pain in the ass, but at the end of every Friday, 2:30 pm to be specific, I get to enjoy the rest of my weekend. Joking aside, with this class, I found my calling and decided that I will pursue this field and develop video games or animated videos.
Overview
The dragon will basically fly around the world on a bezier curve (clear). The world will have strawberries as vegetation. We will also have a terrain for the landscape for the dragon to fly. We can make the dragon breathe fire that will generate smoke particles on whatever gets hit.
To speed up the rendering we will implement Frustum culling. Whatever geometry that the camera cannot see will get culled.
There will be a giant ice tree in the middle of the strawberry fields. Why? because it’s art. And we wanted to somehow put the Game of Thrones motto of “Ice and Fire”.
We want the user to have a psychedelic experience. So we want the colors to be bright (reds, yellows, pinks, light blues). The sky should be marmalade color (like in the lyrics of Lucy in the Sky With Diamonds) or made with colorful fractals. There will be glass orbs in the sky that act like diamonds and provide that sense of warped reality. The fish eye lens (if implemented) will provide an out of body experience, as if the user is seeing the world through a dragon’s eyes. There will also be fractal skies.
Technical Features
- Flying dragon on a bezier curve
- Shadow mapping for the dragon
- Fire breathing particles animation (smoke and fire). We implemented a class that controls the particles by having direction, color, position, and lifespan for variables.
- Camera modes. While the scene is happening, the camera will change from 3rd person to 1st person and vice versa. When the camera is in 3rd person mode, the dragon will be seen flying around the strawberry field. In 1st person mode, the perpective will change to simulate what the dragon is looking at.
- Sky Box. We have added a sky box to make the whole scene as realistic as possible.
The Lighthouse (Andrew Haslam, César de la Vega, Da Zhou)
Concept
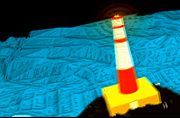
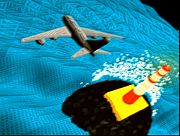
The Lighthouse is an interactive demoscene project centered around a lone lighthouse that stands triumphantly above asperous rocks, unyielding to the formidable sea that surrounds it. The scene takes place at dusk, viewed ‘on-rails’ from above in a plane, just as the sun has fallen below the horizon, beautifully exemplifying the lighthouse’s role as an enduring beacon amidst the approaching storm.
Features Implemented
Post-Processing Shader
The post-processing shader has been implemented using the OpenGL extension, glew, which allows the frame buffer to be used as a texture that is passed through a custom shader before being applied to a polygon. The shader is not based upon any known shaders, and gives the scene a more 'painted' effect, through selective directional blending.
Sea Simulation
The sea has been implemented to simulate both the movement of waves and the splashes emitted when they collide with the rock. The waves are created through a summation of transforming sine waves, whilst the splashes are dynamically calculated in real-time based on the size of the wave colliding with the rock. In order to improve performance, the sea is rendered with most detail closest to the rock, and least detail furthest from the rock.
Rock
Whilst the shape of the rock is always dome-like, it is generated at run-time using an algorithm that randomly shifts edges to give it a more rugged appearance.
Lighthouse
The lighthouse has been created using Sketchup, and its beacon's glow has been emulated using a combination of blended translucent yellow spheres. A custom shader has been used to facilitate the per-pixel shading effects of the light.
Plane
The plane was downloaded from Google 3D warehouse, and its flight path is directed through a combination of connected Bezier paths.
The Zombie Cartoon Invasion of Procedural Land (Matthew Scheifer, Sumin Wang, Chase Murphy)
Theme
In the city of Procedural Generation -- the cartoon city full of beautiful plants and skyscrapers -- zombies have invaded! You are God, a computer programmer. One day while programming in your cloud above the city, you noticed everybody in the city turn into zombies. Your poor humans have mutated into giant, teddy bears of death. These zombie-teddies are fierce and relentless; they search throughout the city, causing mayhem for all whom remain. Fortunately, the city is full of giant skyscrapers, which make it difficult for the zombie-teddies to navigate. However, the zombie-teddies will stop at nothing to destroy what is left of the city. Unfortunately, you cannot help your poor humans, and can only watch as the zombie-teddies infest your favorite procedurally-generated city.
Goals
Our plan was to implement a good L-system for our plants so that they look very lifelike and believable. We wanted to come up with a good algorithm to generate a realistic city that doesn't look too repetitive and could conceivably have been built by real people in the real world. Finally, we wanted to toon shade all of it so that it looks like some kind of cartoon or comic book or something. The zombie-teddies will collide with the buildings, which looks realistic because zombies (or teddy bears) shouldn't be able to walk through walls.
Technical Features
- Toon Shader
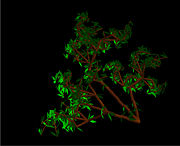
- Procedural plants via L-systems
- Collision detection using bounding boxes
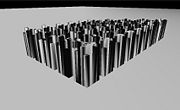
- Prodecurally generated city
Interactions
Use the keyboard to look around the city. Watch as the evil zombie-teddies spread chaos throughout the city.
Keyboard Controls
- w - move forward
- s - move backward
- a - rotate the view to the left
- d - rotate the view to the right
- t - toggle toon shading
- b - toggle bounding boxes
Reflection
Most of the creative effort was put into the procedurally generated plants and buildings. It was difficult to find a way to produce something random, usable, yet still somewhat lifelike. The city is generated by first drawing city blocks in a pseudo-random shape, and then sets the height of each building on the block to a random height. The plants are generated using L-systems: a start string is given along with rules on how to update the string. Then the algorithm recursively replaces the string up to a certain depth. Collision detection is done using the sweep-and-prune algorithm to determine which bounding boxes are overlapping in 3D space. Originally we had planned to use normal-looking zombies, but we had difficulties trying to convert the Google Sketchup models into usable obj files. At that point, we decided to use cute little teddy bears instead (the teddies
Robo Bunny Hunter Mayhem 5 (Tai Nguyen, Tyler Hodgkins, Spencer Runyon)
Post-apocalyptic Survival FPS
December 21, 2012. A mad UCSD professor in the biological engineering department finally perfected a cure for cancer by testing his formula on rabbits. Little did he know that his cure came at the most dearest of costs; his new genetically modified rabbits began to multiply like… rabbits, and became unstoppable!!! Thus, an army of murderous super bunnies was created just as the Mayans had predicted. Almost instantly, the human population of UCSD was (nearly) wiped out and San Diego was soon to follow.
Enter our hero; you are a simple Computer Science Engineer who has been working hard on your CSE 167 final project in the basement lab for quite a number of days, locking yourself inside one of the lab thus shielding yourself from the bunny apocalypse above-ground. Upon completion, you stepped outside to discover the chaotic fluffy-filled city inhabited only by bunnies. Conveniently, you had on yourself an M-9 semiautomatic pistol which proved to be super-effective against genetically modified rabbits. You are now UCSD’s only survivor and your mission is to destroy all of the super bunnies before they take over the planet, starting with San Diego.
Save San Diego ... Save the world.
High Level Overview
The technical effects that we implemented into the game involves particle effects (2 skill points), Procedurally generated plants with L-system (3 skill points), collision detection using bounding boxes (2 skill points), and toon shading (2 skill points).
Since our project is a first-person-shooter game, the camera view is in the same perspective as the character in which we control. Controls to the player involves moving around the X-Z plane using the classical W, A, S, D key mappings for Up, Left, Down, and Right respectively. Moving through the game is pretty straightforward, and since we implemented collision detection the player will not be able to walk through objects in the game such as rabbits and trees. Also since aiming is a critical component of an FPS, we implemented rotation controls of the main camera by following the cursor without the need to click or hold a key/button. Finally, shooting bullets from the gun is handled by left-clicking the mouse.
Once a bullet has reached a rabbit, the rabbit will disappear from the screen and many blood particles will spurt out from its location for a while until it disappears. When the blood particles stop spewing out, a new rabbit will spawn into the world at a random location without the player knowing so that the amount of rabbits in the game will appear as if it’s never-ending. The only other objects in the game are small procedurally generated trees that add to the nature look of the scene. The scene itself is lit by a point light atop the world along the Y-axis so that it will cast different material shadings on the ground. Toon shading takes these different shading gradients and discretize them to certain thresholds such that the shadings look more toon colored than computer generated rendering.
The Hallway of Horror (Michael Chao, Tony Chan)
Background
You awaken to find yourself in the hall of horror. You have become a ghost and can walk through the walls, but be careful – you are not alone! The haunted hallway contains doors that will lead you to different rooms, including the Room of Unspeakable Horror. As of late, the hall has been subject to terrifyingly paranormal activity. It is your job to explore every possible room in hopes of haunting it for yourself. Be careful not to get in the way of the other ghosts who haunt the halls.
Project Description
This project employs the usage of several concepts from CSE167. The hallway then leads to two rooms. One room contains a skull that is used as a particle emitter for fountains of a red liquid substance. The other room contains a ghost that can be toggled on and off. The ghost flies across the room in the path of a cubic Bezier curve. Finally, the ghost in the main hallway leads to The Room of Unspeakable Horror, which is the most terrifying of them all. The entire field of interaction is mapped with different textures that are intended to model a hotel hallway. The initial hallway itself is mapped with a regal carpet and classic-styled wallpaper. The rooms are then mapped with textures of other types of classic wallpaper, dungeon wall textures, stone flooring, and wooden floorboards.
Technical Effects
- Bezier Pathing – The Bezier pathing which was used to control the motion of the ghost of the room on the right side of the corridor was created by first creating a function which computes a Bezier curve for a given set of control points. For every call of the display callback, a time variable t is input to the Bezier function, which returns a coordinate by which the ghost translates. As a result, the ghost undergoes a series of transformations along a curve that is influenced by the control points passed into the Bezier function.
- Particle Effects - In order to create the particle effect, we first insert a small particle texture. We then signify a source from which the particles will fly out. Then, many particles (which are all mapped by the same texture) are dynamically created and removed. These mapped particles will fly out of the source at various velocities. Upon reaching a certain x value away from the source, or upon reaching a certain y value below the source, the particles are removed from the scene.
- Toon Shader – Created by computing the dot product between the normal of each surface, and the light intensity. The resulting values are categorized into four different solid shades. The Toon Shader was implemented in the Hallway of Horror to give it a more cartoony effect alongside a colored tint, which was intended to contrast with the somewhat frightening subject matter.
Keyboard Commands
Movement
- W – Move forward
- A – Look left
- S – Move backward
- D – Look right
- Q – Look up
- Z – Look down
Toggle
- G – Shaders
- L – Bezier Ghost
- P – Particles in skull room
Stargate: CSE167 (Lisa Ke, Kittinan Ponkaew, Thanh Tran)
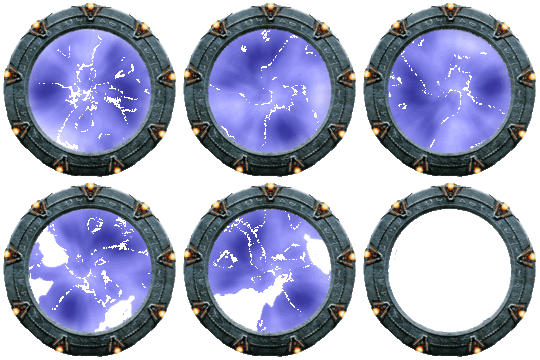
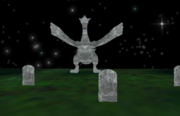
For our final project we have created a user controlled simulation for navigation through a Stargate into a Graveyard themed map. However, the overall theme of our project has nothing to do with Stargate the TV series. We are simply using the Stargate as a means to travel to the world where we will demonstrate the different technical features that we have learned throughout this course. The first part of our project is the Stargate, composed of a torus and a simulated particle system in its center. The inner gate is created using Particle Effects to illustrate the center of the gate and it's unique motion. The gate frame is created using a gate texture texture mapped to our object. In our project, our implementation method doesn’t allow for large amounts of particles, so our stargate only includes approximately 250 particles. For the second part of our project, the graveyard scene, we will be created a world that decorated with graveyards, pokemon statues, and mannequin body parts (to represent dead corpses coming back from the dead). For these decorative pokemon statues, we will be implementing textures and environment mapping to give the statues a more creepy feel reflecting the surrounding scene. The pokemon as statues will fit our scenes overall theme while adding a more random, fun and creative flare. For the actual environment and scene encompassing our world, we have created a nighttime scene in a graveyard. We incorporated different textures and using shadow mapping on the objects in the scene to give it a creepy horror movie feel. We have created a moss filled grassy plane that covers the plane, and a lugia statue located somewhere in our map that demonstrates toon shading and environmental mapping. And to go along with our initial Stargate idea, our world backdrop is a galaxy-esque stars and galaxy backdrop. Furthermore, We have implemented per-pixel illumination of texture-mapped polygons to edit the colors and textures of the world. In this scene the shadow toggles will be used to differentiate between our horror themed scene and a normal one. As well as toggles to turn on and off the per-pixel illumination of the texture mapped polygons. We will also have toggles to turn on and off the environment mapping and toon shading techniques applied to the pokemon themed statues. Some of the main creative aspects we are going to focus on are the different details of the world. For the world environment we focus on implementing shadows to create creepy features and scenery to create a horror-movie esque scene. Our experience with this project has ranged from two ends of the spectrum. We had a lot of good ideas but we also ran into a lot of issues that we had to work around. In the end, we had to change our initial ideas and plans a bit to account for the problems we ran into. Initially we had planned on creating three different maps so that our Stargate could travel to three different worlds. In the end, we condensed our project a bit onto one map combining features into one world.
Technical features
- Particle effect (2 skill points)
- Per-pixel illumination of texture-mapped polygon (2 skill points)
- Toon Shading (2 skill points)
- Shadow Mapping (3 skill points)
- Environment Mapping (3 skill points)
Keyboard Control Functions
- 'a': Turn/Rotate Left
- 'd': Turn/Rotate Right
- 's': Zoom Out
- 'w': Zoom In
- 'l': Illuminate Texture Toggle
- 't': Toon Map Toggle
- 'c': Cube Map Toggle
- 'o': Shadow Map Toggle
- 'r': Reset
- 'ESC': Exit
Mouse Control
- Left Click: Track Ball
The Lonely Island (Trung Thanh Lam, Chi Tsui, Kazuhito Ochiai)
Technical features
- Environment mapping
- Normal mapping
- Procedural terrain
- Procedural robots
- Toon shading
- Fog
- Illumination: 1 spot light ( for the sun in outer space ) , 1 directional light ( for the sun when camera is inside the earth )
- Camera runs along a Bezier curve or is in free mode.
- Revolved Bezier surface create a bottle-like shape . It's used for creating robot limbs.
- IFramework: a simple OpenGL framework created by us.
Interaction
Camera
- F : toggle to switch between free mode and running along bezier
- W,A,S,D : Move camera when in free mode
- -/= : decrease/increase camera speed
General
- 1 : Toggle wireframe
Creative Efforts
Ocean
We create many patches of water bounded by boxes to help for frustum culling. Each patch of water is moved up and down by a heightmap. Water texture is also moved but at slower rate. Normal mapping is applied.
Procedural robots
We use the same idea as creating the bottle of coke in lecture ( shape grammar ). Each time we create a robot, it gives robots of different body parts. It first randomly choose a torso. Torso defines 6 positions ( two arms, two legs, back and head ). Rules are applied to these positions to create corresponding robot parts. Similar approach applies to other detailed robot parts. We can apply a shader/texture to a whole robot or each individual part.
Procedural terrain
there are two types of our terrain: one is generated by a heightmap, one is generated by mid-points displacement algorithm and we smooth it out. The first terrain is also applied lightmap ( black/white color ) to create shadow for terrain with less computation but looks very good. The terrain is textured based on the slope of it. All terrains are applied local illumination.
Camera system
We have two mode: free mode and running along a bezier curve. For second mode, we defines two curves, one for position curve, and one for target curve. The vectors in these curves are used in gluLookAt function. Interpolation between vectors to make the movement look smoothly. We can also move back and forward along the curve in case we want to rewind the movie.
Fog
A simple fog is applied to occlude the boundaries. We don’t want to viewers to see the boundaries so it looks like we have a far distance.
Revolved Bezier Surface
We create a bezier curve on x-y plane. Then we multiply the vertices by rotation matrix to create other bezier curves rotated around y-axis. Finally we connect them together and calculate smooth-normal vectors, texture coordinates. The surface is then used to create limbs for robots.
IFramework
We architect an OpenGL program again by putting light, material, shader, texture, etc. in a neat way so that we can do more with less codes. We also refractor Scene Graph by putting Transform class as a property of each Group or Geode. To make simple animation, we just need one line of code. By having a good architecture, we can scale the project bigger.
Corgi Problems (Stephanie Ho, Xue Guo)
Theme
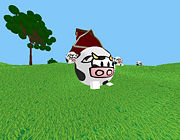
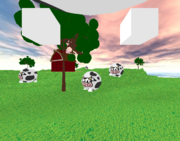
The user is a corgi on a farm while the humans are away. Problem is, the cows have escaped and scattered about! The user has natural herding instincts to round the cows back, but in this world, the user is no ordinary corgi. Despite having short corgi legs, the user has super strength and can lift cows to transport them to a desired location. As a side effect of having super strength, the user is also incapable of gently placing cows after picking them up, and instead, cows are thrown across so try to aim well. Carrying cows will make the user walk slower so throwing cows around is encouraged. The cows are scattered all over the area, so it is the user’s job to bring them back before the humans return. Only one cow can be picked up at a time so make sure to find all the cows quickly!
Technical Features
- Randomly generated terrain: Implemented using the diamond-square algorithm to make terrain more interesting and hilly. Dealt with interesting bugs that generated extreme (high and low) height values. Played around with terrain scale to make terrain have smoother hills rather than rocky. Stored quad vertices in height map.
- Collision detection with terrain: Given (x,z) coordinate, find which terrain quad contains the coordinate and perform bilinear interpolation on that quad to calculate the terrain height at that point. Collision detection on terrain is used to implement camera movement as user walks over hilly terrain and is used to implement cows bouncing over the terrain. Border checks are used to prevent user from walking off map.
- Pickup and throw cows: Check if there is a cow within pick up distance from user. When a cow is thrown, Eueler physics is used to adjust velocities over time for the bouncing effect. The velocity adjustments were played around with to achieve desired bouncing effect. Cows that bounce on the border of map will bounce back as if there is an invisible wall to prevent them from bouncing off the map.
- L-system trees: Most of the time was spent on figuring out the input strings to parse.
Creative
- Cows: Created a simple cow with scene graph and drew cow texture. Cow legs animate about when the user picks up the cow and while the cow is bouncing in the air. - Farm: Created a flat dirt patch of land for the farm. Barn object modeland texture acquired from online. From the inside of the barn, the roof gets culled so back face culling can be toggled.
- Sky Box: Make distant area more scenic.
- Seamless textures used everywhere.
Controls
The user can use a combination of keyboard and mouse to travel around the map although the keyboard alone also works.
- Rotate left: key ‘a’ or mouse Rotate right: key ‘d’ or mouse
- Move forward: key ‘w’
- Move backward: key ‘s’
- Pick up a cow: key ‘e’ (when user is near cow and not already holding a cow)
- Throw a cow: key ‘e’ (when holding a cow)
- Toggle back face culling: key ‘c’ Toggle sky box: key 'b'
Day and Night (Hu Gao, Kevin Liao, Ivan Tham)
Our group has decided to create an interactive 3D scene for our final project named "Day and Night". The theme of our scene is going to focus on the environment and lighting changes between day and night. The story of our scene involves someone who fainted while walking across the Sahara Desert and dreamed of that very scene and its abundance of interesting objects and effects. Due to his current state, desperate and thirsty for water, the scene appropriately displays the desires of this lost wanderer. The rain symbolizes his desire for water while the castle shows his desire for a resting place. The tree symbolizes his desire for a long life. He also dreamed of an ever-changing mountain to show how the mountain seemed infinitely far away. Interactions
The terrain may be regenerated by a keypress. Also, the position of the sun can be changed, which alters the time of day/night. The shadows can also be toggled at will.
Keyboard Commands
- s - toggle shadows
- t - rebuild build the terrain
- l - lower the sun and dim the light
- u - raise the sun and brighten the light
Technical Effects
The technical features that we are going to use for this project include: procedurally generated terrain, shadow mapping, bounding box collision detection, and particle effect. There will be a mountain that is procedurally generated. The major objects in the scene will have shadows with respect to the light source. Particles are used to generate the sun and rain. The rain will bounce back up when it hits the bounding box of the castle. The user may also enable and disable shadow mapping.
- Shadow Mapping: The shadow map is gendered offscreen using an OpenGL framebuffer object (FBO) in the form of a z-buffer from the light's point of view. The scene is then rendered from the camera's original point of view and the resulting distances are compared with those in the z-buffer. A shadow is casted on that spot if it is farther from the point in the z-buffer.
- Procedurally Generated Terrain: We generate a 2D array of height values, often referred to as a heightmap. It is similar to a bitmap for an image but it stores height values instead of color values. We generate the terrain by filling the heightmap with random values and then averaging the values at any point with those around it. Then we just draw the terrain based on that filled array (using GL_QUADS).
- Particle System: We implemented a particle class with the fundamental components of a particle such as position, lifetime, color, and speed. We created emitters for these particles so that the particles would work together to create the rain and sun. Two types of emitters we used was a point and plane emitter, the point emitter was used for the sun and had the particles explode outwards so it looks like a dandelion, and the rain emitter would have particles drip down like rain from a cloud.
- Bounding Box Collision: We calculated the midpoint of our castle as well as the minimum and maximum x, y, and z values in order to find the height and width of our bounding box for the castle. After finding this, we would call these values into our update method so that if any object would fall inside this range, the appropriate collision would occur. We do this by checking if the individual values fall within the minimum and maximum values in each of the 3 dimensions. In our scene, the rain would collide into the castle and reverse its direction and change its speed randomly.
Creative Efforts
The user can change between day and night for the whole scene. Depending on whether it is day or night, the position of the sun and the light intensity changes. Also, when it is night time, the shadows are disabled and vice versa. We used some interesting object models for our scene.
The Bipolar Graphics Student (Eric Chung, Yixin Zhu)
Story
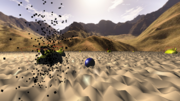
The scene is a desolated landscape desert. The main character is a bipolar UCSD student who woke up in the middle of the desert after a night of drinking in order to forget about how terribly he thought he did on the CSE 167 midterm. He is extremely bipolar and goes in and out of rage mode. When in rage mode, he utilizes the things he learned in CSE 167 and starts creating particle effects - or as we see it, blowing up things. He walks around looking for a way back to campus but all the way going in and out of rage mode in a random fashion - almost as if there was some user controlling his mood swings. When in rage mode, if he walks into a teapot, it will begin exploding, but if not in rage mode then nothing happens. Sometimes, due to his hangover, he imagines watching himself walk around in 3rd person. Surrounded by beautiful terrain, stuck in the middle of nowhere, and unable to control his rage, the UCSD student searches helplessly for a way back home where he can pick up his midterm and end his psychological torment.
Interactions
- In normal mode, the user is able to move around the skybox with the w/a/s/d keys and jump with space. It can collide into various sized teapots but doing so will have no visual effects.
- In debug mode, the user is able to move around the skybox with the w/a/s/d keys and jump with space. However, unlike in normal mode, when the user collides into a teapot, the collision will cause the teapot to explode.
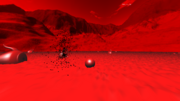
- In rage mode, the user is not in control of the character. When the character approaches the boundaries of the skybox, we, the architects, will automatically teleport the character back to the origin of the world and thus, saving its life.
Supported keyboard and mouse commands
- w/s - move forward/backward
- a/d - rotate left/right
- space - jump
- f - fullscreen
- r - toggles rage mode
- p - resets character position in world
- h - enables toon shading
- u - enables debug mode
- v - change view
- 1/2/3 - change terrain models
Technical effects
- Procedurally generated terrain
- Partical effects
- Collision detection w/ bounding box
- Toon shading
Creative focus
The creative focus of the project is to blow shit up. Specifically, we focused on user interactivity with the scene and ability to blow up randomly positioned teapots. The result of collisions will be beautifully crafted explosions. In addition, we added a skybox and terrain to setup a desert-like environment for the user. As for when the character is in rage mode, we emphasized on the lack of controls given to by the player. As a result, the whole scene becomes bloodshot red to represent the anger and frustration within the character.
Experience
We had a great time programming this project because we allowed our creative juices to flow by adding an arsenal of features. Initially, we planned our movement based on mouse control but later settled with w/a/s/d movements due to simplicity and time constraints. Most of our features described by the initial write up are implemented in the final version of our project.
Animal Maze (Amell Alghamdi, Kristina Pinkerton)
Theme and Story
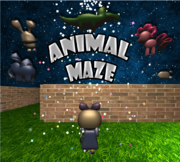
Welcome to the Animal Maze! The baby animals want to play hide and seek with you today. They will all be randomly hidden inside the brick maze, hiding behind various trees. Use the mouse and keys to look and walk all around, they could be hidden anywhere. You better find them all before the time runs out or you will lose and the animals will be very sad and give you no confetti!
List of Technical Features in our Game
- Shadow Mapping: We implemented Shadow Mapping with two passes. The first pass renders the scene from the light’s point of view and copies it into a texture image. Then in the second pass we render from the camera’s point of view and send the texture matrix, texture coordinates, and texture image of the shadow plus other uniforms necessary for lighting, textures, etc. to render the actual scene.
- Particle System: We implemented a particle system that gave each particle a random bright colors and a slow velocity to resemble confetti falling when the player wins or findings an animal.
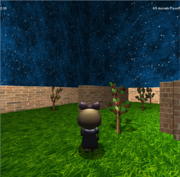
- L-System (plant): The trees in our scene are recursively generated using the L-System technique and randomly positioned throughout the maze.
- Procedural Terrain (maze): Our maze specifications are generated using a depth-first search to randomly break down the walls. We then use this data to build up the blocks of the maze in the scene.
- Collision Detection (walls-only): We used a simple collision detection algorithm to only compare against the walls of the maze, that consisted of checking the players desired location, converting it to the square in the maze and checking it against the blocked walls of that square.
An overview of our Creative Efforts
- Creating original 3D animals and a girl avatar object with Blender. We have a little bunny rabbit, a crocodile, an elephant, a mouse, and pink pony. We built that girl in separate pieces so that she could be animated while she walks. Her feet and arms will move back and forth!
- The game is set during a starry night within a brick maze. When you move around the scene the stars in the sky appear to be moving and sparkling setting a beautiful scene.
- Adding important game mechanics such as a timer and a win condition. If you don’t find all five animals within the time limit you will lose and not get to see the grand finale!
- We implemented randomness for the animal locations, and collision detection with the walls to make the game more difficult and realistic. With these to features our game is different every play and keeps the player from cheating!
Keyboard Controls
| W | Move forward |
| D | Move right |
| A | Move left |
| S | Move backward |
| Q | Turn left |
| E | Turn right |
| O | Toggle shadow mapping |
| T | Toggle view point |
| ESC | exit game |
Robot Defense (Kuen-Han Lin, Matteo Mannino, Ashish Tawari)
Background Story
This augmented reality driven experience places you in an awkward situation. Martian robots have worked up the nerve to inhabit your desktop. It all has fallen onto you to do what you born to do, and blow those sons of guns back to the dark side of Jupiter. Right-click fires your proton bomb while aiming with the mouse, and the number 2 key whips out a flashlight to go dark and turn off the lights in your virtual room. (1 switches back to ambient) Just when you think you've seen it all, you may look to your right and find out that, my god, it wasn't a Martian on your desktop - it was your best friend at the keyboard! That's right, this is a two-player experience, fun for whole family!
Project Description
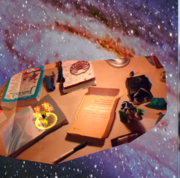
This project features a 3D point cloud mesh reconstruction through Delauney triangulation to model a common desktop. The point cloud from this desktop was obtained from a camera sensor, and the associated camera images have been used to texture the mesh. Rectangle-to-sphere and sphere-to-point cloud collision detection is done to detect bullet collisions with the desktop and the animated player 2 controlled robot. The point cloud also has a bounding box around it for efficiency. The explosions are rendered as particle effects, where the particles are billboarded texture sprites with fire, smoke, and a shockwave. A spotlight is added for an eerie effect, and the whole scene is covered by a galaxy sky box that is literally out of this world.
Our creative efforts were mostly focused on making the desktop mesh look fairly good, and automatically generated from point cloud data. The desktop we used had books, papers, and obstacles on it for the purpose of interesting geometry and height variation. Much time was also spent on tuning our particle explosion effects. The game loop and controls took some time to get the right feel, and various algorithms – such as triangle detection, binary space partition trees, and plane detection - were tried for collision detection with the mesh before settling on point cloud collisions with a bounding box. This provided the most efficient solution, presumably because comparing points is easy, and since it is done in a linear array we minimize cache misses. In contrast, comparisons and calculations for triangle collisions simply took longer due to all the calculations, and the BSP trees with either collision detection was overkill for 400 points that have easy calculations.
Features
- Point cloud, box, and sphere collisions
- Point cloud collisions with spherical bullet projectile
- Box collisions (Bounding box on top of mesh) with spherical bullet projectile
- Sphere-to-sphere collisions with robot to projectile
- Mesh construction
- Delauney triangulation
- Matching two meshes
- Particle effects
- Explosions and smoke effects
Controls
- Mouse: Aim Gun
- 1 to toggle ambient light mode
- 2 to toggle dark flashlight mode
- Right click to fire
- 'J' to rotate robot left
- 'L' to rotate robot right
- 'I' to move robot forward
