Difference between revisions of "Project7Fall11Summaries"
| (27 intermediate revisions by one user not shown) | |||
| Line 1: | Line 1: | ||
{| border="1" cellspacing="0" | {| border="1" cellspacing="0" | ||
| + | |- valign="top" | ||
| + | | [[Image:2011-p7a.png]] [[Image:2011-p7b.png]] [[Image:2011-p7c.png]] | ||
| + | | | ||
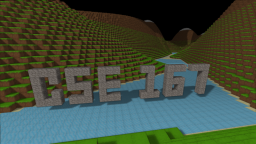
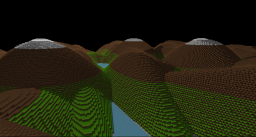
| + | ==Blocktastic (Ryan Mourey, Josh Walters)== | ||
| + | |||
| + | '''About''' | ||
| + | |||
| + | Our goal was to copy the look and feel of the game Minecraft, with some added visual features (SSAO and Shadow Maps). | ||
| + | |||
| + | Minecraft is well known for its distinctive blocky look. We wished to re-create this, and see what that would look like with fancy lighting and shadow effects | ||
| + | |||
| + | From our time playing Minecraft we became curious how it draws so many polygons per frame while still having the game playable on low end computers. We also wanted to explore the capabilities of having a first person camera, complete with gravity/jumping and object collision allowing for the player to climb block mountains and explore block valleys. Minecraft included minimal lighting effects, so we wanted to explore how shadow maps and SSAO would look in a world full of blocks. For our procedurally generated terrain we want to make blocky mountains and valleys that the player can climb up and walk into. | ||
| + | |||
| + | '''Technical''' | ||
| + | |||
| + | Screen space ambient occlusion (SSAO) was implemented using the model put forward in the Crysis paper. The depth buffer is read after the scene is fully rendered, we then compare each fragment to the depth of surrounding fragments and produce an occlusion factor. | ||
| + | |||
| + | Our shadow map shader was implemented in the traditional way, the depth buffer from the light perspective is used to see if a fragment in the camera space is occluded. We improved upon standard shadow maps by using percentage-closer filtering (PCF). We applied a jitter to each texture read in order to help reduce the Moiré pattern. At high sample rates it produces very high quality results resembling true soft shadows. | ||
| + | |||
| + | Terrain generation is done in two passes. The first pass generates most of the terrain using multiple sin and cos waves based on pseudo random numbers and a given seed. The second pass places lakes and grass. | ||
| + | |||
| + | Collision detection is accomplished by treating the player as a rectangle, and then checking for collision with all eight of the player vertices. As the player moves through the game the game always knows what block the player is on, and if the player is not on a block than the player is affected by gravity, which accelerates the player down. | ||
| + | |||
| + | Rendering and scene management is a done the following way: | ||
| + | |||
| + | * Blocks are split up into chunks, and a group is 16x16x16 blocks | ||
| + | * A VBO is assigned to a block chunk, the chunk uses this VBO to draw the chunks that should be drawn | ||
| + | * A block should be drawn if it is a visible block type, and is not surrounded by solid blocks | ||
| + | * Frustum culling is used to not draw chunks | ||
| + | * Chunks get an update priority, based on how close they are to the player, and the last time their data was updated | ||
| + | * Only X amount of chunks are updated each game loop iteration | ||
| + | * When a chunk is updated it determines what blocks should be drawn | ||
| + | * When the player moves through the world, chunks 'behind' the player are removed, and new chunks are generated in front of the player | ||
| + | * These new chunks are then assigned to use the VBO the old chunks that were removed used | ||
| + | * There are 4 threads constantly running | ||
| + | # Thread for player updates | ||
| + | # Updating chunk data to draw | ||
| + | # Generating and loading new chunks | ||
| + | # Callbacks, and rendering | ||
| + | * Current top end machines can support a client world of 41*13*41 chunks, that comes out to 89,509,888 blocks! (not all blocks are drawn at the same time) | ||
| + | |||
| + | '''Controls''' | ||
| + | * Look: Mouse | ||
| + | * Move: WASD | ||
| + | * Jump: Space | ||
| + | * Place block: Left mouse button | ||
| + | * Delete block: Right mouse button | ||
| + | * Enable/Disable rendering options: O, L, and P | ||
| + | |} | ||
| + | |||
| + | {| border="1" cellspacing="0" | ||
| + | |- valign="top" | ||
| + | | [[Image:2011-p9.png]] | ||
| + | | | ||
| + | ==RoboQuest (Ben Ng, Eric Hsieh )== | ||
| + | |||
| + | '''Background Story''' | ||
| + | |||
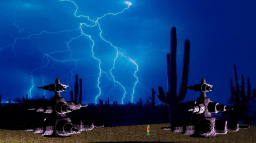
| + | The robot, C1S6E7, was sent by its master to find a very important object in the forest. This dedicated little robot has continued to search day and night, and tonight, an approaching thunderstorm may bring an end to our hero's quest. Flashing lightning in the distance lights up the forest as this faithful servant calmly searches. | ||
| + | |||
| + | '''Project Description''' | ||
| + | |||
| + | This project is going to demonstrate a few uses of Bezier curves. One feature is the surface of the ground will be a large Bezier surface created from a set of control points. We will apply a texture to the ground to give it the feel of a dark field of grass. Now that the ground is no longer flat, the position of everything that sits on the ground will need to be adjusted accordingly. We will also have a moving object, a walking robot with a flashlight, which will move along a path defined by a Bezier curve. As the robot walks, it will climb up and down the hills of the ground. The path will take it around a forest of fractual plants. The plants start as a Bezier curve rotated to create a basic shape. Smaller versions of the shape are repeated on its surface, and even smaller are repeated on the surface of those. The process is repeated until the shapes are too small to see, and a texture is applied to give the illusion of infinite recursion. In order to highlight the effects of the curves, as well as give a good background story, a distant light is enabled for quick flashes of lightning. | ||
| + | |||
| + | '''Features:''' | ||
| + | * Bezier surface as ground (with texture) | ||
| + | * Bezier curve as path (3D) | ||
| + | * Procedurally generated fractual plants | ||
| + | |||
| + | '''Controls''' | ||
| + | * Mouse: Trackball | ||
| + | * Type 'q' to quit program | ||
| + | * Type '-' to zoom out | ||
| + | * Type '+' to zoom in | ||
| + | * Type 'w' to toggle Robot walking | ||
| + | * Type 'l' to toggle Lightning setting | ||
| + | * Type 'p' to toggle On/Off of Point Light | ||
| + | * Type 'f' to toggle On/Off of Flash Light | ||
| + | * Type 's' to toggle Solid/Line Mode | ||
| + | * Type 't' to toggle test or normal texture pattern | ||
| + | * Type 'o' to toggle On/Off of OpenGL default Light | ||
| + | * Type 'g' to Change the ground shape | ||
| + | |} | ||
| + | |||
| + | {| border="1" cellspacing="0" | ||
| + | |- valign="top" | ||
| + | | [[Image:2011-p12a.png]] [[Image:2011-p12b.png]] [[Image:2011-p12c.png]] | ||
| + | | | ||
| + | ==Alien Botanic Conservationist (Space Gardener 2000) (Mads Pedersen, Kristian Hansen)== | ||
| + | |||
| + | [http://tordenoglynild.dk/hosted/abcsg2000/ View this project's web site here.] | ||
| + | |||
| + | Trees are a vital part of modern bureaucracy, without paper, the world as we know it stands doomed to chaos and anarchy. In this mindset, with paper being the lungs of the ecosystem that is civilization, a sinister plot is unfolding. There is no visible foe, but a phantom menace that lies within our very way of living. You are about to embark on a journey, so fierce, so cruel, that it is no longer conquerable by humanity itself, we need help from the outside, we need help from the Woodnians. | ||
| + | |||
| + | Navigate an immerse 3-dimensional world with procedurally generated trees, beautifully mastered ambient occlusion, intense and life-like bump-mapping textures and to add to the never ending realism of this real-world simulation, per-pixel illumination, as you fight the never ending waves of missing trees. | ||
| + | |} | ||
| + | |||
| + | {| border="1" cellspacing="0" | ||
| + | |- valign="top" | ||
| + | | [[Image:2011-p8.png]] | ||
| + | | | ||
| + | ==Wild Wild West (Andreas Ulltveit-Moe, Fredrik Hvaring)== | ||
| + | |||
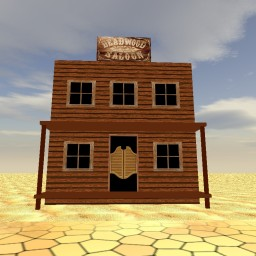
| + | The theme for our project is an old western city. The user can walk around on the city's only street. There is a bank, saloon, sheriff's office and a hotel. There are also citizens walking around on the street. For technical features, we have implemented procedurally generated mountains, bushes designed with the use of L-Systems and camera-movement along a Bezier curve. | ||
| + | |||
| + | '''Keys:''' | ||
| + | * 'w' - forward | ||
| + | * 'a' - left | ||
| + | * 's' - backwards | ||
| + | * 'd' - right | ||
| + | |} | ||
| + | |||
| + | {| border="1" cellspacing="0" | ||
| + | |- valign="top" | ||
| + | | [[Image:2011-p6.png]] | ||
| + | | | ||
| + | |||
| + | ==Hello World (Christian Jonassen, Casey Chen)== | ||
| + | |||
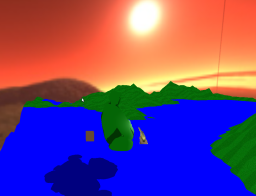
| + | This is a demonstration of automatic terrain generation on the CPU | ||
| + | through the Diamond Square algorithm, as well as shadow mapping. | ||
| + | For the terrain, a square of pixels is being subdivided in a | ||
| + | particular way as to generate a natural looking terrain. Each point in | ||
| + | the terrain then defines vertex in a triangle. | ||
| + | |||
| + | The story is as follows: | ||
| + | You find yourself on a mysterious planet where the terrain regenerates | ||
| + | every time you hit the 'n' key! | ||
| + | Dark shadows are being cast on you. Fortunately, you are in possession | ||
| + | of the Golden Gun. That's good. It doesn't work, but that's OK. | ||
| + | |||
| + | Since you are in deep space, you are practically weightless and find | ||
| + | yourself able to use the familiar WASD-keys and the mouse to navigate | ||
| + | around this crazy place. | ||
| + | |} | ||
| + | |||
| + | {| border="1" cellspacing="0" | ||
| + | |- valign="top" | ||
| + | | [[Image:2011-p5a.png]] [[Image:2011-p5b.png]] [[Image:2011-p5c.png]] | ||
| + | | | ||
| + | |||
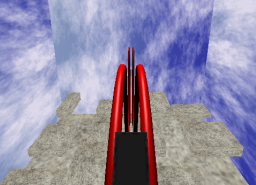
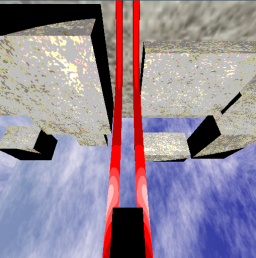
| + | ==Coaster (Nicholas Burbaum, Andrew Shen)== | ||
| + | |||
| + | '''Project Description''' | ||
| + | |||
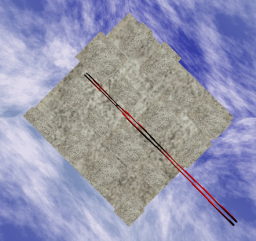
| + | A roller coaster moves through a small urban environment. The sun shines on the scene, and the cart that moves along the roller coaster track shines a headlight onto the tracks as it moves. | ||
| + | |||
| + | <p>Several rendering options are provided:</p> | ||
| + | |||
| + | <table border="1" cellspacing="0"> | ||
| + | <tr><th>Key</th><th>Option</th></tr> | ||
| + | <tr class="camera-control"> | ||
| + | <td class="vk">b</td> | ||
| + | <td>Show a bird's-eye view of the scene.</td> | ||
| + | </tr> | ||
| + | <tr class="camera-control"> | ||
| + | <td class="vk">c</td> | ||
| + | <td>Show the scene from just behind the cart.</td> | ||
| + | </tr> | ||
| + | <tr class="scene-control"> | ||
| + | <td class="vk">g</td> | ||
| + | <td>Toggle the environment (sky and ground; NOT buildings).</td> | ||
| + | </tr> | ||
| + | <tr class="shader-control"> | ||
| + | <td class="vk">n</td> | ||
| + | <td>Use the standard OpenGL (Gouraud) point and spot lighting.</td> | ||
| + | </tr> | ||
| + | <tr class="shader-control"> | ||
| + | <td class="vk">p</td> | ||
| + | <td>Use per-pixel illumination from GLSL shaders.</td> | ||
| + | </tr> | ||
| + | <tr class="shader-control"> | ||
| + | <td class="vk">t</td> | ||
| + | <td>Use cartoon-style GLSL shaders.</td> | ||
| + | </tr> | ||
| + | </table> | ||
| + | |||
| + | <p>Legend:</p> | ||
| + | <table border="1" cellspacing="0"> | ||
| + | <tr> | ||
| + | <td class="camera-control">Camera controls</td> | ||
| + | <td class="scene-control">Scene control</td> | ||
| + | <td class="shader-control">Lighting controls</td> | ||
| + | </tr> | ||
| + | </table> | ||
| + | |||
| + | <h3>Technical Overview</h3> | ||
| + | |||
| + | <p>Being rather pressed for time due to circumstances leading up to our | ||
| + | partnership and collaboration in this project, we implemented a simple | ||
| + | demonstration of several basic and intermediate shader techniques and camera | ||
| + | movement using Bézier curves.</p> | ||
| + | |||
| + | <h4>Shaders</h4> | ||
| + | |||
| + | <p>Our project features three major lighting techniques. The first (and | ||
| + | default) method uses the Gouraud lighting model provided by the base OpenGL | ||
| + | library. We use a stationary spotlight to represent the sun | ||
| + | (<tt>GL_LIGHT0</tt>), and another mobile spotlight (<tt>GL_LIGHT1</tt>) to | ||
| + | act as the cart's headlamp. The quality of the rendered frames is acceptable, | ||
| + | but some geometric artifacts are visible.</p> | ||
| + | |||
| + | <p>The <span class="vk">p</span> key switches the scene to using GLSL spot | ||
| + | shaders to light the scene. These shaders are based off the lighting | ||
| + | algorithms covered in class and sample shader code from the OpenGL site. | ||
| + | The effect of using GLSL shaders is relatively equivalent to the results | ||
| + | obtained from Gouraud lighting, but is noticeably smoother; a side effect | ||
| + | of using certain values of spot cutoffs and spot exponents causes the scene | ||
| + | to be a bit darker when rendered with shaders than with the default OpenGL | ||
| + | lighting model.</p> | ||
| + | |||
| + | <p>The <span class="vk">t</span> key switches the scene to cartoon shading, | ||
| + | incorporating a mild edge-line effect and discretized coloring. This effect | ||
| + | is most visible when the light positions are such that the track's specular | ||
| + | component is presented clearly to the camera; it also manifests some unusual | ||
| + | coloring artifacts in the concrete texture used on the buildings and the | ||
| + | ground.</p> | ||
| + | |||
| + | <h4>Bézier paths</h4> | ||
| + | |||
| + | <p>The default camera position (loaded when the project is started, or by using | ||
| + | the <span class="vk">b</span> key) is fixed to a point in the sky, watching the | ||
| + | roller coaster cart move across the track. This does not involve any special | ||
| + | camera motion.</p> | ||
| + | |||
| + | <p>The <span class="vk">c</span> key places the camera just behind and above the | ||
| + | cart that moves across the roller coaster tracks. The tracks and the camera path | ||
| + | are both loaded from an external file containing control points for Bézier | ||
| + | curves. The curves specified by the control points are C1 continuous for a | ||
| + | smooth riding experience, and the camera position and cart orientation are | ||
| + | interpolated for every position that the cart occupies during its journey.</p> | ||
| + | |||
| + | <p>Of particular interest is the method of making the cart pitch to match the | ||
| + | slope of the tracks. This is achieved by rotating the cart around an axis | ||
| + | normal to both tracks, calculated by taking the cross product of the current | ||
| + | velocity of the cart <b>d</b>, and the outward normal to the tracks <b>n</b>, | ||
| + | <b>d</b>×<b>n</b>. The angle by which the cart will be rotated so that | ||
| + | its bottom will be tangent to the tracks is determined by the angle between | ||
| + | <b>d</b> and the projection of <b>d</b> onto the <i>x-z</i> plane. Since for | ||
| + | our scene the tracks are exclusively located at <i>z</i>=0, we can simplify | ||
| + | this to the angle between <b>d</b> and ‹1, 0, 0›. However, we can | ||
| + | only determine the positive angle between the two vectors, but on downward | ||
| + | slopes we must rotate by a negative angle. To resolve this, we check the sign | ||
| + | of the <i>z</i>-component of <b>d</b>×<b>n</b>. If the <i>z</i>-value | ||
| + | is negative, we negate the angle to pitch the cart forward.</p> | ||
| + | |||
| + | |} | ||
| + | |||
| + | {| border="1" cellspacing="0" | ||
| + | |- valign="top" | ||
| + | | [[Image:2011-p14a.png]] [[Image:2011-p14b.png]] | ||
| + | | | ||
| + | ==Flights of Fancy (Corey Mangosing, Brian Yip, William Seo)== | ||
| + | |||
| + | For our final project, we will create a movie consisting of a scene of an airplane flying through a the sky. The scene consists of a stunt plane performing aerial maneuvers over the backdrop of a vast canyon. To accomplish this project, we are planning to implement following techniques. | ||
| + | |||
| + | # '''Move the object along a path defined by a piecewise Bezier curve:''' Upon keyboard input, the plane will perform aerial stunts. The stunts will consist of the plane being guided along the path of a piece-wise Bezier curve. The coordinates of the curve will specify the relative location of the plane, while the normal vectors of the curve will specify the plane’s orientation/ rotation throughout space. | ||
| + | # '''Dynamically Generated Canyons:''' We are going to render our canyon terrain with piecewise Bezier surface technique making the surface of terrain look more realistic Further away the surface, the higher the surface of the surface will be. This will produce an effect of land sloping down making it look like a canyon. The movie will show the plane flying along the canyon walls. In order to show the canyon moving along the screen, we will utilize a method that will cull surfaces that exit the view of the scene and produce randomized, yet continuous, surfaces that are about to appear on screen. The new surfaces will be randomized and C1 continuous with adjacent surface to give the impression of a realistic canyon. | ||
| + | # '''Shadow Mapping:''' Shadow Mapping Method is where you generate shadow map from light source and apply shadow to the scene. The implementation of Shadow Mapping with GLSL, consists two passes. First Pass is where you need to generate whole scene in the light source's point of view in order to get the z depth texture. Second Pass is where you generate the scene from actual camera's point of view and translate the depth coordinates from light's position to camera's position and bind the depth texture you got from the first pass. Before displaying the scene, I had to initialize the texture for the shadow and also initialize the frame buffer object, so that we can render the texture of z value we got from light's point of view and use the frame buffer object to generate shadow in second pass along with shader. During first pass, get depth value or z and render into the frame buffer object. Then we modify the projection and model view matrix based on Light's poistion and Light's look at. Also in order to compute depth bias glPolygonOffset was used in first pass for better shadow result. After drawing the scene, i need to transform object space to shadow map. Using the bias Matrix giving in the slide show, projection matrix, and modelview matrix, I was able to get the tranformed matrix that is ready for camera's perspective scene. During the Second pass, I toggled the shadow mapping, setting the texture we are gonna work with by glActiveTextureARB. In order to save the texture coordinates, I used the shader class followed by fragmentShader.frag, and vertexShader.vert. I load the texture using this class and binded when shadow mapping was toggled. And the set the Projection Matrix and Modelview Matrix as Camera's Perspective and display the scene. That was pretty much it about the Shadow Mapping. I have cited the sources where I got the fragmentShader.frag, and vertexShader.vert. Also I used the code from this website as a reference for my shadow mapping. | ||
| + | |||
| + | # '''Fighter Jet:''' The movie will show the plane flying along the canyon walls. The plane itself will be stationary while the canyon will be changing and moving giving the appearance that the plane is flying along. The stunts will consist of the plane being guided along the path of a piece-wise Bezier curve. The coordinates of the curve will specify the relative location of the plane, while the normal vectors of the curve will specify the plane’s orientation/ rotation throughout space. At a key press 'l', the jet will perform said manuever. The jet itself was ready made in google sketch, and imported into blender to create the .obj file in triangle meshes as seen here. We use triangle meshes because the object reader that we used in our previous assignment read in triangle meshes. | ||
| + | |} | ||
| + | |||
| + | {| border="1" cellspacing="0" | ||
| + | |- valign="top" | ||
| + | | [[Image:2011-p13.png]] | ||
| + | | | ||
| + | |||
| + | ==The Future of Rampart (James Farquhar, Patrick Guan, Matthew Jones)== | ||
| + | |||
| + | [http://acsweb.ucsd.edu/~pguan/ Click here for the project's web site] | ||
| + | |||
| + | '''Story''' | ||
| + | |||
| + | In the distant future, humans have long since abandoned the confines of Earth's terrestrial bounds. However, warfare is omnipresent and humans must always fight to prove who has the bigger pillar. Since it is the future, everyone is super smart and puzzle addiction has become the norm among teenagers. Now that we're traversing the universe with quantum neutrino technology that travels faster than light, humans have long since settled on many planets. A new popular fad with teens is to play the rampart. Teenagers will pick a random planet in the solar system that is stable enough to build on and will fight each other in an epic battle known as a Rampart. The objective is simple--destroy each other's territory by blowing it up. The players have one round of establishing a fortress, one round of placing artillery, then one round of destroying the other fortress. The fortress acts as a laser shield around the resource center it encloses. The blocks players use to surround a resource center are shaped much like tetris blocks, as the tetris fandom has long since evolved from mobile phone games centuries before. Once the players enclose resource centers, they have a round to place artillery, synthesized from the local resource foundry. Once this is done, the players will attempt to obliterate the walls and/or artillery recently established by the adversary. After that, there is a rebuilding period where the adolescent emperors have to cleverly rebuild their fortress as to first seal back up their territory then surround another tower to gain more resources for artillery. After this phase, the teenagers safe up in their space ships will attempt to secure victory by shooting their cheap interplanetary lasers at the enemy territory. If no tower is enclosed by walls, the laser will obliterate the resource center, signifying victory. This process continues until only one player has resource centers still standing and shielded. In the end, only the most clever of teens will have a fortress left standing. It is up to you to be this calculating conqueror. | ||
| + | |||
| + | '''Techniques''' | ||
| + | |||
| + | # '''Bezier Patch Surfaces:''' The base of the flags are generated with an elaborate bezier surface that surrounds a hemisphere at the base of the flag. Innovation for this idea was the project of bezier curves and surfaces from project 6. | ||
| + | # '''Bezier curved travel path:''' The canon is affected by magic and travels in curved paths to confuse the enemy on where the cannon ball is actually heading.This was accomplished by providing a random path of control points for the cannon ball to follow and moving its speed based on the tangent at that point on the curve. It makes the canon ball more interesting and creates distractions for the other player. | ||
| + | # '''Collision Detection:''' The canon ball uses collision detection to determine when it hits a block. It uses a detection of sphere and cube. The sphere is the canon ball and the cube is the blocks that are placed in the world. It does detection of the cannon ball with the designated aimed target. And when a collision is detected, the ball disapears and a collision occurs. BOOM!!! | ||
| + | |||
| + | # '''Particles:''' Particles show explosions.When the cannon hits the wall. It goes BOOM!! We used a cell shaded texture as the sprites to give it a cartoony feel. This was inspired by our favorite Zelda game, The Wind Waker. Particles are many individual points that move with a direction, speed and they are affected by gravity to make them go down. They also have a lifetime so that they disappear after some time. | ||
| + | |||
| + | '''Game Engine''' | ||
| + | |||
| + | We made a simple game engine to handle the game logic for this game. It includes a scene graph to handle player controls for arbitrary number of players. It also handles events such as updating the scene and calling the special effects | ||
| + | |} | ||
| + | |||
| + | {| border="1" cellspacing="0" | ||
| + | |- valign="top" | ||
| + | | [[Image:2011-p15.png]] [[Image:2011-p15a.png]] [[Image:2011-p15b.png]] [[Image:2011-p15c.png]] | ||
| + | | | ||
| + | |||
| + | ==The Lonely Warren Bear, The Warren Bear is Alone for Christmas (Raymond Paseman, Vincent Huynh)== | ||
| + | (The Warren Bear Doesn't Want to be Alone for Christmas) | ||
| + | |||
| + | [[Media:2011-p15.pdf | Download a PDF version of this summary with more pictures.]] | ||
| + | |||
| + | '''Theme:''' | ||
| + | |||
| + | Around this time of year, every year, the students of UCSD depart from the campus to escape from the painful confinements of education. They return to their friends and families to reunite, converse, and feast in celebration of Christmas and New Years. Their minds wander away from reality as they engage in boisterous activities. Everyone is at liberty from their personal dilemmas and without a care in the world. | ||
| + | |||
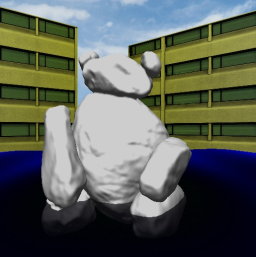
| + | However, back at the UCSD campus, one poor lonely soul has been left behind, all alone in the empty silence. From the day the Warren Bear was born, he has experienced loneliness in the limited confines of the engineering quad lawn of the Warren College Campus. Upon first sight and joy of the holiday season, the students have temporarily forgotten and abandoned the Warren Bear. All alone, Warren Bear cries himself a river anxiously awaiting for the day that the celebrations end and the students return to him. He cries for attentions in hope that he will find some companionship to get him through these cold, tough times. | ||
| + | |||
| + | '''Technical Features:''' | ||
| + | * Particle Systems (Particles and Particle Engine was used for crying tears) | ||
| + | * Toon Shading (can be run through the Warren bear and water pool of accumulated tears) | ||
| + | * Water Effects | ||
| + | ** shader for Fresnel Effect with light | ||
| + | ** animated small waves with changing generated Height Map | ||
| + | ** transparency through alpha blending | ||
| + | * Bezier Patches (alternative way to display the water and waves) [incomplete] | ||
| + | |||
| + | '''Techniques:''' | ||
| + | |||
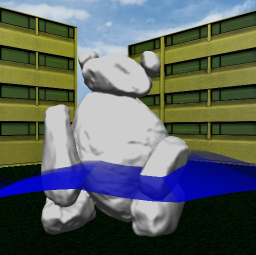
| + | Our first endeavors began with creating the focus of our project, the graphical representation of water. We began at first by using a grid of many Bezier patches to portray the surface of a body of water. The Bezier patches would have changing control points to animate some moving small waves within the water. However, we ran into some complications dealing with the C1 continuity within a grid of Bezier patches. It was simple to deal with C1 continuity with a 1-dimensional/direction attachment of Bezier patches (as in a 2-patch piece flag), but it was slightly more troublesome with 2-dimensional/direction attachments of many patches to create a grid collection of Bezier patches representing our pool of water. This ultimately lead to issues calculating the proper normal vectors at the joining edges. Normal vectors are the determining factor to produce proper effects with the light interaction properties of water. | ||
| + | |||
| + | Assuming the Bezier patches were fully functional, it would suffice for our body of water. At this point we decided to try out an alternative method to represent water, using height maps to generate our body of water. The waves and animations of the water are now produced by creating a height map using the product of a sin function and cos function using the u-coordinates and v-coordinates along with an increasing time value to vary the waves in different locations. | ||
| + | |||
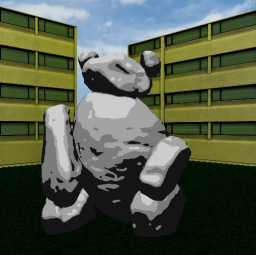
| + | Our next focus was to add the bear in as the centerpiece to our scene. The Warren Bear was provided to us through an .obj file containing the vertices to draw the bear onto the screen. It was a simple task. We produced two shaders to show the Bear in a different way. One was using a more natural method to color to bear in the given lighting. It was a shader to shade the Bear for a point-light with Per-Pixel Shading using the Phong Illumination Model. We then produced a Toon Shader to shade the Bear in a less serious and fun manner. It provides a funny cartoon way to display the scene. | ||
| + | |||
| + | To give a reason for the sudden body of water being created, we came up with the idea to have the bear create the pool of water through the form of tears. For this reason, we introduce a particle system to simulate particles of water flowing into the body of water. To make it seem like particles of water, we use numerous random number functions to generate the directions in which the particles move. In addition, the life span and initial velocity of each particle varies as well to bring some randomness and spread out the particles. Certain thresholds are used to prevent the particles from flying all over the place or living forever. In addition, thresholds are used to make the flow of particles move in a certain direction and orientation. | ||
| + | |||
| + | To complete our project, we worked on additional effects that portray the visual properties of water. We introduced a shader that contributes the Fresnel Effect to the surface of the pool of water. This effect is what causes water to seem both transparent and opaque. From a large view angle compared to the normal vector of the water surface, water tends to reflect a lot light making it bright and glare at the viewer. However from a small view angle, water tends to reflect little light, and the viewer sees through the water surface as if it is transparent. To simulate the transparency, we use alpha-blending with the water to make it blend colors with the objects behind or within it and make it "seem" transparent. | ||
| + | |||
| + | There are some particular effects that we had not done in our project due to the intensity of the calculations. For the Bear's tears, we didn't handle proper alpha blending. If proper alpha blending was taken care of, it would project a visual effect similar to what is seen on waterfalls. Large masses of water particles with randomness of movement would contribute to a range of colors from darker blues to lighter blues to whites to demonstrate transparencies based on density of the water particles. However, based on the number of particles we used, we would have to keep track or calculate a particle's position compared to another water particle's position for proper alpha blending. This relative calculation would be on par to calculating collision detection between all the particles. | ||
| + | |||
| + | In addition, another intensive calculation would be calculating where the particles hit the body of water to produce a visual effect of ripples and turbulences in the water. This is literally doing collision detection for thousands of particles as they hit the water. In addition, the body of water is constantly moving, so it'd have to be calculated constantly. The region of contact of the particles with the body of water would gradually get closer to the Bear as the body of water rises up. Instead, we handle this by determining general locations to produce the ripples and turbulences based on the water level. | ||
| + | |||
| + | '''Toggle Keys''' | ||
| + | * "C" - causes the bear to cry and stop crying | ||
| + | * "B" - toggles the bear between the various shaders (no shading, per-pixel shading, and toon shading) | ||
| + | * "W" - toggles the body of water between the various shaders (no shading, per-pixel shading, toon shading, and Fresnel Effect shading) | ||
| + | |} | ||
| + | |||
| + | {| border="1" cellspacing="0" | ||
| + | |- valign="top" | ||
| [[Image:2011-p2.png]] | | [[Image:2011-p2.png]] | ||
| − | | | + | | |
| + | |||
==Watch out for that Tree! (Jeanne Wang, Andrew Muinos)== | ==Watch out for that Tree! (Jeanne Wang, Andrew Muinos)== | ||
| Line 8: | Line 347: | ||
{| border="1" cellspacing="0" | {| border="1" cellspacing="0" | ||
| + | |- valign="top" | ||
| [[Image:2011-p1.png]] | | [[Image:2011-p1.png]] | ||
| | | | ||
| Line 35: | Line 375: | ||
{| border="1" cellspacing="0" | {| border="1" cellspacing="0" | ||
| + | |- valign="top" | ||
| [[Image:2011-p10.png]] | | [[Image:2011-p10.png]] | ||
| | | | ||
| Line 71: | Line 412: | ||
{| border="1" cellspacing="0" | {| border="1" cellspacing="0" | ||
| + | |- valign="top" | ||
| [[Image:2011-p3.png]] | | [[Image:2011-p3.png]] | ||
| | | | ||
| Line 104: | Line 446: | ||
{| border="1" cellspacing="0" | {| border="1" cellspacing="0" | ||
| + | |- valign="top" | ||
| [[Image:2011-p11.png]] | | [[Image:2011-p11.png]] | ||
| | | | ||
| Line 125: | Line 468: | ||
{| border="1" cellspacing="0" | {| border="1" cellspacing="0" | ||
| + | |- valign="top" | ||
| [[Image:2011-p4.png]] | | [[Image:2011-p4.png]] | ||
| | | | ||
| Line 139: | Line 483: | ||
'''Technical Features Summary''' | '''Technical Features Summary''' | ||
{| border="1" cellspacing="0" | {| border="1" cellspacing="0" | ||
| + | |- valign="top" | ||
| Procedurally Generated Environment | | Procedurally Generated Environment | ||
| Walls of the maze and trees are randomly generated. | | Walls of the maze and trees are randomly generated. | ||
Latest revision as of 13:14, 7 December 2011
|
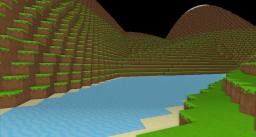
Blocktastic (Ryan Mourey, Josh Walters)About Our goal was to copy the look and feel of the game Minecraft, with some added visual features (SSAO and Shadow Maps). Minecraft is well known for its distinctive blocky look. We wished to re-create this, and see what that would look like with fancy lighting and shadow effects From our time playing Minecraft we became curious how it draws so many polygons per frame while still having the game playable on low end computers. We also wanted to explore the capabilities of having a first person camera, complete with gravity/jumping and object collision allowing for the player to climb block mountains and explore block valleys. Minecraft included minimal lighting effects, so we wanted to explore how shadow maps and SSAO would look in a world full of blocks. For our procedurally generated terrain we want to make blocky mountains and valleys that the player can climb up and walk into. Technical Screen space ambient occlusion (SSAO) was implemented using the model put forward in the Crysis paper. The depth buffer is read after the scene is fully rendered, we then compare each fragment to the depth of surrounding fragments and produce an occlusion factor. Our shadow map shader was implemented in the traditional way, the depth buffer from the light perspective is used to see if a fragment in the camera space is occluded. We improved upon standard shadow maps by using percentage-closer filtering (PCF). We applied a jitter to each texture read in order to help reduce the Moiré pattern. At high sample rates it produces very high quality results resembling true soft shadows. Terrain generation is done in two passes. The first pass generates most of the terrain using multiple sin and cos waves based on pseudo random numbers and a given seed. The second pass places lakes and grass. Collision detection is accomplished by treating the player as a rectangle, and then checking for collision with all eight of the player vertices. As the player moves through the game the game always knows what block the player is on, and if the player is not on a block than the player is affected by gravity, which accelerates the player down. Rendering and scene management is a done the following way:
Controls
|
|
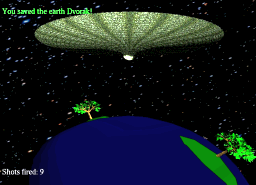
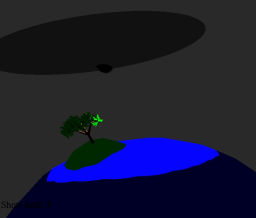
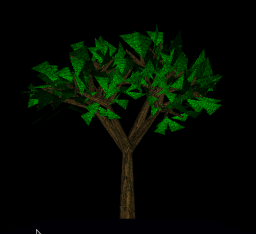
Alien Botanic Conservationist (Space Gardener 2000) (Mads Pedersen, Kristian Hansen)View this project's web site here. Trees are a vital part of modern bureaucracy, without paper, the world as we know it stands doomed to chaos and anarchy. In this mindset, with paper being the lungs of the ecosystem that is civilization, a sinister plot is unfolding. There is no visible foe, but a phantom menace that lies within our very way of living. You are about to embark on a journey, so fierce, so cruel, that it is no longer conquerable by humanity itself, we need help from the outside, we need help from the Woodnians. Navigate an immerse 3-dimensional world with procedurally generated trees, beautifully mastered ambient occlusion, intense and life-like bump-mapping textures and to add to the never ending realism of this real-world simulation, per-pixel illumination, as you fight the never ending waves of missing trees. |
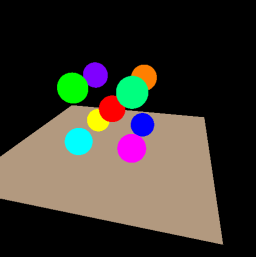 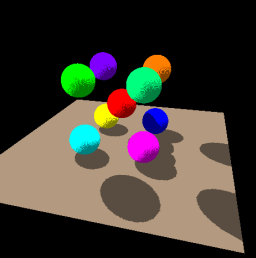
|
Flights of Fancy (Corey Mangosing, Brian Yip, William Seo)For our final project, we will create a movie consisting of a scene of an airplane flying through a the sky. The scene consists of a stunt plane performing aerial maneuvers over the backdrop of a vast canyon. To accomplish this project, we are planning to implement following techniques.
|
|
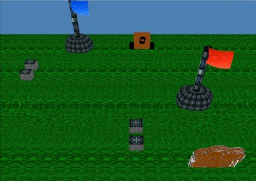
The Future of Rampart (James Farquhar, Patrick Guan, Matthew Jones)Click here for the project's web site Story In the distant future, humans have long since abandoned the confines of Earth's terrestrial bounds. However, warfare is omnipresent and humans must always fight to prove who has the bigger pillar. Since it is the future, everyone is super smart and puzzle addiction has become the norm among teenagers. Now that we're traversing the universe with quantum neutrino technology that travels faster than light, humans have long since settled on many planets. A new popular fad with teens is to play the rampart. Teenagers will pick a random planet in the solar system that is stable enough to build on and will fight each other in an epic battle known as a Rampart. The objective is simple--destroy each other's territory by blowing it up. The players have one round of establishing a fortress, one round of placing artillery, then one round of destroying the other fortress. The fortress acts as a laser shield around the resource center it encloses. The blocks players use to surround a resource center are shaped much like tetris blocks, as the tetris fandom has long since evolved from mobile phone games centuries before. Once the players enclose resource centers, they have a round to place artillery, synthesized from the local resource foundry. Once this is done, the players will attempt to obliterate the walls and/or artillery recently established by the adversary. After that, there is a rebuilding period where the adolescent emperors have to cleverly rebuild their fortress as to first seal back up their territory then surround another tower to gain more resources for artillery. After this phase, the teenagers safe up in their space ships will attempt to secure victory by shooting their cheap interplanetary lasers at the enemy territory. If no tower is enclosed by walls, the laser will obliterate the resource center, signifying victory. This process continues until only one player has resource centers still standing and shielded. In the end, only the most clever of teens will have a fortress left standing. It is up to you to be this calculating conqueror. Techniques
Game Engine We made a simple game engine to handle the game logic for this game. It includes a scene graph to handle player controls for arbitrary number of players. It also handles events such as updating the scene and calling the special effects |
|
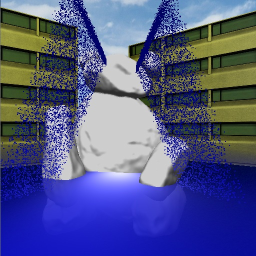
The Lonely Warren Bear, The Warren Bear is Alone for Christmas (Raymond Paseman, Vincent Huynh)(The Warren Bear Doesn't Want to be Alone for Christmas) Download a PDF version of this summary with more pictures. Theme: Around this time of year, every year, the students of UCSD depart from the campus to escape from the painful confinements of education. They return to their friends and families to reunite, converse, and feast in celebration of Christmas and New Years. Their minds wander away from reality as they engage in boisterous activities. Everyone is at liberty from their personal dilemmas and without a care in the world. However, back at the UCSD campus, one poor lonely soul has been left behind, all alone in the empty silence. From the day the Warren Bear was born, he has experienced loneliness in the limited confines of the engineering quad lawn of the Warren College Campus. Upon first sight and joy of the holiday season, the students have temporarily forgotten and abandoned the Warren Bear. All alone, Warren Bear cries himself a river anxiously awaiting for the day that the celebrations end and the students return to him. He cries for attentions in hope that he will find some companionship to get him through these cold, tough times. Technical Features:
Techniques: Our first endeavors began with creating the focus of our project, the graphical representation of water. We began at first by using a grid of many Bezier patches to portray the surface of a body of water. The Bezier patches would have changing control points to animate some moving small waves within the water. However, we ran into some complications dealing with the C1 continuity within a grid of Bezier patches. It was simple to deal with C1 continuity with a 1-dimensional/direction attachment of Bezier patches (as in a 2-patch piece flag), but it was slightly more troublesome with 2-dimensional/direction attachments of many patches to create a grid collection of Bezier patches representing our pool of water. This ultimately lead to issues calculating the proper normal vectors at the joining edges. Normal vectors are the determining factor to produce proper effects with the light interaction properties of water. Assuming the Bezier patches were fully functional, it would suffice for our body of water. At this point we decided to try out an alternative method to represent water, using height maps to generate our body of water. The waves and animations of the water are now produced by creating a height map using the product of a sin function and cos function using the u-coordinates and v-coordinates along with an increasing time value to vary the waves in different locations. Our next focus was to add the bear in as the centerpiece to our scene. The Warren Bear was provided to us through an .obj file containing the vertices to draw the bear onto the screen. It was a simple task. We produced two shaders to show the Bear in a different way. One was using a more natural method to color to bear in the given lighting. It was a shader to shade the Bear for a point-light with Per-Pixel Shading using the Phong Illumination Model. We then produced a Toon Shader to shade the Bear in a less serious and fun manner. It provides a funny cartoon way to display the scene. To give a reason for the sudden body of water being created, we came up with the idea to have the bear create the pool of water through the form of tears. For this reason, we introduce a particle system to simulate particles of water flowing into the body of water. To make it seem like particles of water, we use numerous random number functions to generate the directions in which the particles move. In addition, the life span and initial velocity of each particle varies as well to bring some randomness and spread out the particles. Certain thresholds are used to prevent the particles from flying all over the place or living forever. In addition, thresholds are used to make the flow of particles move in a certain direction and orientation. To complete our project, we worked on additional effects that portray the visual properties of water. We introduced a shader that contributes the Fresnel Effect to the surface of the pool of water. This effect is what causes water to seem both transparent and opaque. From a large view angle compared to the normal vector of the water surface, water tends to reflect a lot light making it bright and glare at the viewer. However from a small view angle, water tends to reflect little light, and the viewer sees through the water surface as if it is transparent. To simulate the transparency, we use alpha-blending with the water to make it blend colors with the objects behind or within it and make it "seem" transparent. There are some particular effects that we had not done in our project due to the intensity of the calculations. For the Bear's tears, we didn't handle proper alpha blending. If proper alpha blending was taken care of, it would project a visual effect similar to what is seen on waterfalls. Large masses of water particles with randomness of movement would contribute to a range of colors from darker blues to lighter blues to whites to demonstrate transparencies based on density of the water particles. However, based on the number of particles we used, we would have to keep track or calculate a particle's position compared to another water particle's position for proper alpha blending. This relative calculation would be on par to calculating collision detection between all the particles. In addition, another intensive calculation would be calculating where the particles hit the body of water to produce a visual effect of ripples and turbulences in the water. This is literally doing collision detection for thousands of particles as they hit the water. In addition, the body of water is constantly moving, so it'd have to be calculated constantly. The region of contact of the particles with the body of water would gradually get closer to the Bear as the body of water rises up. Instead, we handle this by determining general locations to produce the ripples and turbulences based on the water level. Toggle Keys
|
|
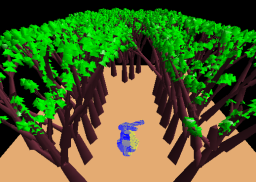
Watch out for that Tree! (Jeanne Wang, Andrew Muinos)You are a cute little bunny hopping through a procedurally generated terrain of L-system trees. Sadly you are also not the brightest of bunnies and don't always look where you're going. Try to watch out for that tree! Luckily for you, little bunny, you and the forest look cool due to our screen space ambient occlusion shader, so props to you for that. |
|
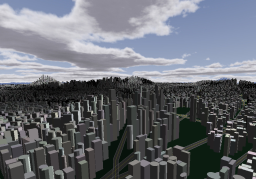
A Day in Metropolis (Peter Fu, Zhe Fu)The view is quite good from up above! Flying high above Metropolis the viewer can get a glimpse of the vast buildings and highways that make up Metropolis. Built by through the power of procedural modeling and sort of L-system, the city consists of buildings of different sizes and roads that dissect the city in every which way. Following the path of piecewise Bezier curves, the viewer is taken on a trip around the city high above the streets where one can view the sky above them and the city below them. Mouse movement also give the user control of the view, and can view the city in any which direction. If the view seems less interesting, turn on the toon shading to see another face of the city. As the sun rises high above the city be sure to notice what difference light makes on the faces of the buildings. The city is looking good from all points of view. The technical features we focused on are:
Supported keyboard & mouse interactions:
|
|
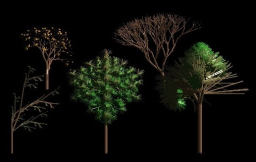
Eternal Woodland (Anthony Medeiros, Trevor Pottinger)Project Description You find yourself in a forest. The plants are very interesting looking and you notice they all are uniquely different but strangely realistic. As you travel through the Eternal Woodland time slows giving the forest time to expand an infinite distance. You begin to question reality. Can this be real? Am I lost? Can you escape the Eternal Woodland? Time can’t tell. Planned Effects We plan on using Liedenmeyer-Systems to draw the trees and then we will add an ambient occlusion shader to make the trees appear more realistic. Should time persist, we will draw the trees procedurally and allow for more free realming of the Eternal Woodland. Since ambient occlusion is only interesting when objects are overlapping and there is a lot of them on the screen, we will have density parameterized in the drawing of our trees, If we have time to make a forest, using procedural drawing, we will have the density of the forest also parameterized. Creative Efforts We will spend our time making the trees look unearthly but still being biologically feasible. To the common viewer, the trees should look eerie, yet somewhat familiar, because they will be based off of willlow and eucalyptus trees (Should be basing off models that are around such as dragon trees etc.). Our goal will to have different colors, but appear soft, and earthy like all trees do. We plan on doing this by having grammars as an input. Random generation of the forest will be seeded by random variations in the grammar for each individually spawned tree. Since the shader simply works or doesn’t, the creative efforts there will be to figure out accurate amount of sampling, and possibly different weights. Then, since as long as the shader is being implemented, adding phong shading (should time persist) should make the trees appear more realistically round. During our research of ambient occlusion we came across different methods for computing it, and our creative efforts could also be spent on comparing the different methods. Screen Space Ambient Occlusion We learned a great deal about the rendering pipeline, and the vast possibilities that emerge when a texture is rendered in real-time. The main difficulties of this effect was debugging, due to the limited commands that can be used in GLSL, and calculating values in different coordinate spaces. Lindenmayer System Trees Determining when to draw the leaves was slightly more difficult than the rest of the effect. Controls
|
|
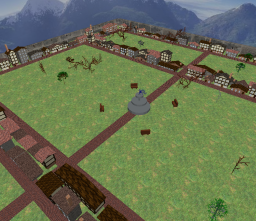
Procedural Victorian City (Cathy Hughes, Zhanzhan He)Theme and Story We created a procedurally generated Victorian-inspired city which can be explored through means of a first person character control system. Specific Rendering Effects The world has a park filled with trees and bushes generated by L-Systems surrounded by buildings generated using procedural modelling. We seed the world generation using a string supplied by the user, similar to games such as Minecraft. If the user finds a world they particularly like, it can be reproduced by supplying the same seed. The buildings are randomly sized boxes with various numbers of randomly sized windows and doors, as well as a slanted roof of varying pitch and orientation. The number of stories of the houses are also randomly generated. We created a 1st person control scheme similar to that seen in video games. The user is able to walk around and explore the world using the w-s keys to move forward and back, a-d to rotate side to side, and q-z to rotate up and down. Creative Efforts We used seamless repeating textures for our buildings (including thatched roofs, stone and timber-framed walls, and brick chimneys) and appropriate colors for our plants to convincingly convey our Victorian theme. We also made the world as non repetitive as possible. We achieved this by generating different varieties of trees and plants using different L-System rules and randomizing their placement. We also have a library of textures for walls, roofs, doors and windows of buildings from which we select randomly to improve the amount of variation. The park also features a fountain which shoots L-System generated water and is surrounded by wooden park benches. To improve the realism of the world, we render it in a bounding box or with a texture to represent the sky and use the built in OpenGL lighting. Feature Summary
|
|
A Day in the Forest (Eric Anderson, Huy Tran)The general idea would to create a moving sun that would hover over a simple forest of basic trees. As the sun moves over the environment, it would expose shadows of the trees and other objects that would be seen. Because the sun would be "orbiting" around the environment, it would also create a pseudo night/day effect. The trees of the environment would be created using a basic L-system whereas the shadow effects would be implemented using simple shadow mapping. Controls
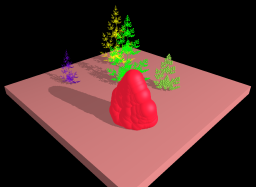
Features
|
|
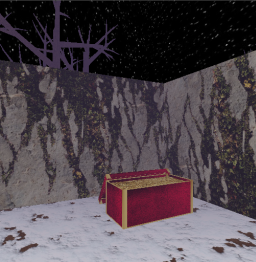
Winter Woods Maze (Shannon McPeak, Chris McFarland)Hidden deep within the snowy forest ruins lies a secret treasure... can you find it? For our final project, we made a maze that takes place in a forest setting during the winter. The story behind our project is that someone is lost in forest ruins looking for a hidden treasure. The objective of the maze will be to find the treasure chest that is hidden somewhere in the maze. The walls of the maze are composed of stone and covered in vines and the floor of the maze is covered in snow. There are large dead looking trees within the maze (since it is winter, the trees have no leaves) and there is also a fog effect. The player is able to navigate with the standard WASD/mouse controls ('a' and 'd' allow the player to strafe). This allows the player to look around in their environment. The mouse look up and down is limited to a fixed range to simulate how far you can tilt your head back. For our technical features, we procedurally generated both the maze itself and trees within the maze. The tree trunks have branches that vary in their orientation. Lastly, we implemented collision detection with the walls so that the player is not able to go through them. The player is able to slide along walls. For our artistic efforts, we focused on creating an appealing winter atmosphere. We attempted to make our maze artistically stylized rather than photorealistic. The mood of the scene is meant to be mysterious. Technical Features Summary
|
