Difference between revisions of "Project7Fall11Summaries"
(→Flights of Fancy (Corey Mangosing, Brian Yip, William Seo)) |
|||
| Line 6: | Line 6: | ||
For our final project, we will create a movie consisting of a scene of an airplane flying through a the sky. The scene consists of a stunt plane performing aerial maneuvers over the backdrop of a vast canyon. To accomplish this project, we are planning to implement following techniques. | For our final project, we will create a movie consisting of a scene of an airplane flying through a the sky. The scene consists of a stunt plane performing aerial maneuvers over the backdrop of a vast canyon. To accomplish this project, we are planning to implement following techniques. | ||
| − | # Move the object along a path defined by a piecewise Bezier curve | + | # '''Move the object along a path defined by a piecewise Bezier curve:''' Upon keyboard input, the plane will perform aerial stunts. The stunts will consist of the plane being guided along the path of a piece-wise Bezier curve. The coordinates of the curve will specify the relative location of the plane, while the normal vectors of the curve will specify the plane’s orientation/ rotation throughout space. |
| + | # '''Dynamically Generated Canyons:''' We are going to render our canyon terrain with piecewise Bezier surface technique making the surface of terrain look more realistic Further away the surface, the higher the surface of the surface will be. This will produce an effect of land sloping down making it look like a canyon. The movie will show the plane flying along the canyon walls. In order to show the canyon moving along the screen, we will utilize a method that will cull surfaces that exit the view of the scene and produce randomized, yet continuous, surfaces that are about to appear on screen. The new surfaces will be randomized and C1 continuous with adjacent surface to give the impression of a realistic canyon. | ||
| + | # '''Shadow Mapping:''' Shadow Mapping Method is where you generate shadow map from light source and apply shadow to the scene. The implementation of Shadow Mapping with GLSL, consists two passes. First Pass is where you need to generate whole scene in the light source's point of view in order to get the z depth texture. Second Pass is where you generate the scene from actual camera's point of view and translate the depth coordinates from light's position to camera's position and bind the depth texture you got from the first pass. Before displaying the scene, I had to initialize the texture for the shadow and also initialize the frame buffer object, so that we can render the texture of z value we got from light's point of view and use the frame buffer object to generate shadow in second pass along with shader. During first pass, get depth value or z and render into the frame buffer object. Then we modify the projection and model view matrix based on Light's poistion and Light's look at. Also in order to compute depth bias glPolygonOffset was used in first pass for better shadow result. After drawing the scene, i need to transform object space to shadow map. Using the bias Matrix giving in the slide show, projection matrix, and modelview matrix, I was able to get the tranformed matrix that is ready for camera's perspective scene. During the Second pass, I toggled the shadow mapping, setting the texture we are gonna work with by glActiveTextureARB. In order to save the texture coordinates, I used the shader class followed by fragmentShader.frag, and vertexShader.vert. I load the texture using this class and binded when shadow mapping was toggled. And the set the Projection Matrix and Modelview Matrix as Camera's Perspective and display the scene. That was pretty much it about the Shadow Mapping. I have cited the sources where I got the fragmentShader.frag, and vertexShader.vert. Also I used the code from this website as a reference for my shadow mapping. | ||
| − | + | # '''Fighter Jet:''' The movie will show the plane flying along the canyon walls. The plane itself will be stationary while the canyon will be changing and moving giving the appearance that the plane is flying along. The stunts will consist of the plane being guided along the path of a piece-wise Bezier curve. The coordinates of the curve will specify the relative location of the plane, while the normal vectors of the curve will specify the plane’s orientation/ rotation throughout space. At a key press 'l', the jet will perform said manuever. The jet itself was ready made in google sketch, and imported into blender to create the .obj file in triangle meshes as seen here. We use triangle meshes because the object reader that we used in our previous assignment read in triangle meshes. | |
| − | + | ||
| − | # | + | |
| − | + | ||
| − | + | ||
| − | + | ||
| − | + | ||
| − | + | ||
| − | + | ||
| − | + | ||
| − | + | ||
| − | + | ||
| − | + | ||
| − | + | ||
| − | + | ||
| − | + | ||
| − | + | ||
| − | + | ||
| − | + | ||
| − | + | ||
| − | + | ||
| − | + | ||
| − | + | ||
| − | + | ||
| − | The movie will show the plane flying along the canyon walls. The plane itself will be stationary while the canyon will be changing and moving giving the appearance that the plane is flying along. | + | |
| − | + | ||
| − | The stunts will consist of the plane being guided along the path of a piece-wise Bezier curve. The coordinates of the curve will specify the relative location of the plane, while the normal vectors of the curve will specify the plane’s orientation/ rotation throughout space. At a key press 'l', the jet will perform said manuever | + | |
| − | + | ||
| − | + | ||
| − | The jet itself was ready made in google sketch, and imported into blender to create the .obj file in triangle meshes as seen here. We use triangle meshes because the object reader that we used in our previous assignment read in triangle meshes. | + | |
|} | |} | ||
| Line 43: | Line 16: | ||
| [[Image:2011-p13.png]] | | [[Image:2011-p13.png]] | ||
| | | | ||
| + | |||
==The Future of Rampart (James Farquhar, Patrick Guan, Matthew Jones)== | ==The Future of Rampart (James Farquhar, Patrick Guan, Matthew Jones)== | ||
Revision as of 16:10, 6 December 2011
| File:2011-p14.png |
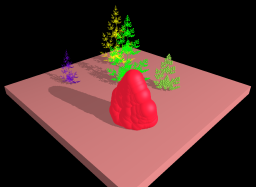
Flights of Fancy (Corey Mangosing, Brian Yip, William Seo)For our final project, we will create a movie consisting of a scene of an airplane flying through a the sky. The scene consists of a stunt plane performing aerial maneuvers over the backdrop of a vast canyon. To accomplish this project, we are planning to implement following techniques.
|
|
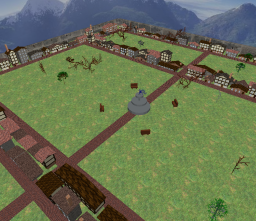
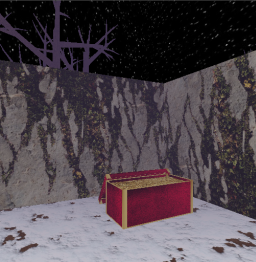
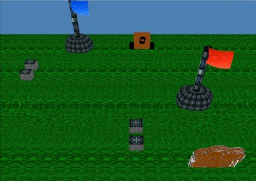
The Future of Rampart (James Farquhar, Patrick Guan, Matthew Jones)Click here for the project's web site Story In the distant future, humans have long since abandoned the confines of Earth's terrestrial bounds. However, warfare is omnipresent and humans must always fight to prove who has the bigger pillar. Since it is the future, everyone is super smart and puzzle addiction has become the norm among teenagers. Now that we're traversing the universe with quantum neutrino technology that travels faster than light, humans have long since settled on many planets. A new popular fad with teens is to play the rampart. Teenagers will pick a random planet in the solar system that is stable enough to build on and will fight each other in an epic battle known as a Rampart. The objective is simple--destroy each other's territory by blowing it up. The players have one round of establishing a fortress, one round of placing artillery, then one round of destroying the other fortress. The fortress acts as a laser shield around the resource center it encloses. The blocks players use to surround a resource center are shaped much like tetris blocks, as the tetris fandom has long since evolved from mobile phone games centuries before. Once the players enclose resource centers, they have a round to place artillery, synthesized from the local resource foundry. Once this is done, the players will attempt to obliterate the walls and/or artillery recently established by the adversary. After that, there is a rebuilding period where the adolescent emperors have to cleverly rebuild their fortress as to first seal back up their territory then surround another tower to gain more resources for artillery. After this phase, the teenagers safe up in their space ships will attempt to secure victory by shooting their cheap interplanetary lasers at the enemy territory. If no tower is enclosed by walls, the laser will obliterate the resource center, signifying victory. This process continues until only one player has resource centers still standing and shielded. In the end, only the most clever of teens will have a fortress left standing. It is up to you to be this calculating conqueror. Techniques
Game Engine We made a simple game engine to handle the game logic for this game. It includes a scene graph to handle player controls for arbitrary number of players. It also handles events such as updating the scene and calling the special effects |
|
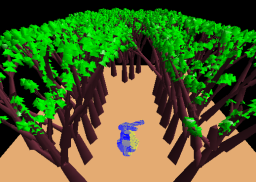
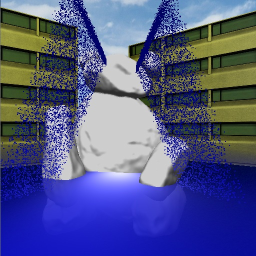
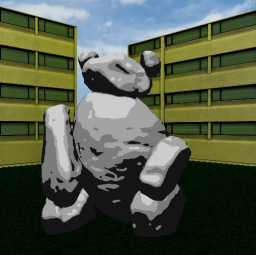
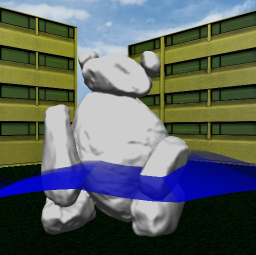
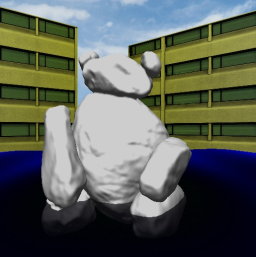
The Lonely Warren Bear, The Warren Bear is Alone for Christmas (Raymond Paseman, Vincent Huynh)(The Warren Bear Doesn't Want to be Alone for Christmas) Download a PDF version of this summary with more pictures. Theme: Around this time of year, every year, the students of UCSD depart from the campus to escape from the painful confinements of education. They return to their friends and families to reunite, converse, and feast in celebration of Christmas and New Years. Their minds wander away from reality as they engage in boisterous activities. Everyone is at liberty from their personal dilemmas and without a care in the world. However, back at the UCSD campus, one poor lonely soul has been left behind, all alone in the empty silence. From the day the Warren Bear was born, he has experienced loneliness in the limited confines of the engineering quad lawn of the Warren College Campus. Upon first sight and joy of the holiday season, the students have temporarily forgotten and abandoned the Warren Bear. All alone, Warren Bear cries himself a river anxiously awaiting for the day that the celebrations end and the students return to him. He cries for attentions in hope that he will find some companionship to get him through these cold, tough times. Technical Features:
Techniques: Our first endeavors began with creating the focus of our project, the graphical representation of water. We began at first by using a grid of many Bezier patches to portray the surface of a body of water. The Bezier patches would have changing control points to animate some moving small waves within the water. However, we ran into some complications dealing with the C1 continuity within a grid of Bezier patches. It was simple to deal with C1 continuity with a 1-dimensional/direction attachment of Bezier patches (as in a 2-patch piece flag), but it was slightly more troublesome with 2-dimensional/direction attachments of many patches to create a grid collection of Bezier patches representing our pool of water. This ultimately lead to issues calculating the proper normal vectors at the joining edges. Normal vectors are the determining factor to produce proper effects with the light interaction properties of water. Assuming the Bezier patches were fully functional, it would suffice for our body of water. At this point we decided to try out an alternative method to represent water, using height maps to generate our body of water. The waves and animations of the water are now produced by creating a height map using the product of a sin function and cos function using the u-coordinates and v-coordinates along with an increasing time value to vary the waves in different locations. Our next focus was to add the bear in as the centerpiece to our scene. The Warren Bear was provided to us through an .obj file containing the vertices to draw the bear onto the screen. It was a simple task. We produced two shaders to show the Bear in a different way. One was using a more natural method to color to bear in the given lighting. It was a shader to shade the Bear for a point-light with Per-Pixel Shading using the Phong Illumination Model. We then produced a Toon Shader to shade the Bear in a less serious and fun manner. It provides a funny cartoon way to display the scene. To give a reason for the sudden body of water being created, we came up with the idea to have the bear create the pool of water through the form of tears. For this reason, we introduce a particle system to simulate particles of water flowing into the body of water. To make it seem like particles of water, we use numerous random number functions to generate the directions in which the particles move. In addition, the life span and initial velocity of each particle varies as well to bring some randomness and spread out the particles. Certain thresholds are used to prevent the particles from flying all over the place or living forever. In addition, thresholds are used to make the flow of particles move in a certain direction and orientation. To complete our project, we worked on additional effects that portray the visual properties of water. We introduced a shader that contributes the Fresnel Effect to the surface of the pool of water. This effect is what causes water to seem both transparent and opaque. From a large view angle compared to the normal vector of the water surface, water tends to reflect a lot light making it bright and glare at the viewer. However from a small view angle, water tends to reflect little light, and the viewer sees through the water surface as if it is transparent. To simulate the transparency, we use alpha-blending with the water to make it blend colors with the objects behind or within it and make it "seem" transparent. There are some particular effects that we had not done in our project due to the intensity of the calculations. For the Bear's tears, we didn't handle proper alpha blending. If proper alpha blending was taken care of, it would project a visual effect similar to what is seen on waterfalls. Large masses of water particles with randomness of movement would contribute to a range of colors from darker blues to lighter blues to whites to demonstrate transparencies based on density of the water particles. However, based on the number of particles we used, we would have to keep track or calculate a particle's position compared to another water particle's position for proper alpha blending. This relative calculation would be on par to calculating collision detection between all the particles. In addition, another intensive calculation would be calculating where the particles hit the body of water to produce a visual effect of ripples and turbulences in the water. This is literally doing collision detection for thousands of particles as they hit the water. In addition, the body of water is constantly moving, so it'd have to be calculated constantly. The region of contact of the particles with the body of water would gradually get closer to the Bear as the body of water rises up. Instead, we handle this by determining general locations to produce the ripples and turbulences based on the water level. Toggle Keys
|
