Difference between revisions of "Project3F20"
(→4. Ride Design (25 Points)) |
|||
| (100 intermediate revisions by 3 users not shown) | |||
| Line 1: | Line 1: | ||
| − | = | + | =Project 3: Amusement Park Ride= |
| + | In this project you will need to implement a scene graph to render an amusement park ride which consists of a number of objects that are part of a hierarchy. | ||
| − | + | This project implements the following skills from the lectures: | |
| − | + | * texturing | |
| + | * sky box | ||
| + | * environment mapping | ||
| + | * scene graph | ||
| − | + | The user of your program should be able to control a variety of options within your simulation using the keyboard. You may choose which keys control which functions, but make sure they are clearly documented in either a text file named <tt>README.txt</tt> which you add to the main directory of your code, or in your video (narration or text overlays). The following interactive controls should be available to the user: | |
| − | * | + | * Start/stop the animation of each of the levels of your motion hierarchy separately. |
| − | * | + | * Move around within the simulation (by moving the camera): forward, back, up or down, as well as turn the camera left or right (which affects subsequent forward movements). |
| − | + | ||
| + | The total score for this project is 100 points. Additionally, you can obtain up to 10 points of extra credit. | ||
| − | + | There will '''not''' be a discussion on November 11th because of Veterans Day. Instead, this project will be introduced in lecture on Tuesday, November 10th. | |
| − | + | We recommend starting with your code from project 2 and removing the rendering of the 3D models. In this project you are going to render all new objects, using your own implementation of a scene graph. | |
| − | + | ==1. Sky Box (20 Points)== | |
| − | + | ||
| − | + | ||
| − | + | ||
| − | + | ||
| − | + | Create a sky box for your scene, to give it a nice background. [http://learnopengl.com/#!Advanced-OpenGL/Cubemaps LearnOpenGL] offers a great tutorial for sky boxes and how to implement them in modern OpenGL. | |
| − | + | Make sure the width and height of your sky box textures are powers of two, we recommend 512x512 pixels. You are allowed to create your own sky box if you want, many smartphones can capture 360 degree panorama images which you would need to turn into a cube map. If you would rather use ready-made sky boxes from the internet, here a few pointers: | |
| − | + | * http://www.f-lohmueller.de/pov_tut/skyboxer/skyboxer_3.htm ([https://drive.google.com/file/d/1G-lL_eQXxz17ezCIAg5vnE_jHwN2VBl4/view?usp=sharing offline link]) | |
| + | * https://opengameart.org/content/elyvisions-skyboxes ([https://drive.google.com/file/d/1O3WOxZPl2aDQlyDfYnbY42qkFaWGF2Ek/view?usp=sharing offline link]) | ||
| + | * [https://www.cleanpng.com/free/skybox.html These are lower resolution and need to be split up into the individual cube faces.] | ||
| + | * [https://hdrihaven.com/hdris/ These are very nice but need to be re-projected into cube maps (see below).] | ||
| − | + | If you created or downloaded a panorama image from the web, you need to convert it into the six cube map faces you need for the sky box. [https://jaxry.github.io/panorama-to-cubemap/ This web tool can do this for you.] | |
| − | + | Once you created or downloaded your sky box textures, use them to create a sky box by texturing the insides of a very large cube (coordinates from about -500 to +500). Make sure that the textures align correctly at the edges - if not you may need to rotate or flip some of the textures. | |
| − | + | Use single-sided rendering, so that OpenGL will automatically hide the user-facing sides of the cube. If your sky box is defined with the triangles' normals facing outward (like the example in the discussion slides), use the following code lines to ensure that the user will never see the outside of the box: | |
<pre> | <pre> | ||
| Line 62: | Line 66: | ||
* -3 if backface culling is not enabled, or it is enabled but the wrong faces are culled | * -3 if backface culling is not enabled, or it is enabled but the wrong faces are culled | ||
| − | ==Environment Mapping (20 Points)== | + | ==2. Environment Mapping (20 Points)== |
| − | + | Create an algorithm to tessellate a disco ball style sphere (ie, create vertices and normals for a sphere with a relatively low number of quads for faces). Its surface should look like polished metal, so you need to use environment mapping on it. | |
| + | |||
| + | This sphere needs to become part of your amusement park ride later, but we recommend implementing it beforehand so that you can test it out separately. Unless you don't get to render the ride, you don't need to show this sphere separately in your demo (although you could). | ||
| + | |||
| + | We provide code for the sphere geometry [https://github.com/cbutarbu/Sphere_167 for Windows] and [https://github.com/cbutarbu/Sphere_167/tree/macOS for Mac]. But feel free to write your own. | ||
The [http://learnopengl.com/#!Advanced-OpenGL/Cubemaps Cube map tutorial] explains how environment mapping is done with a sky box as the environment. Feel free to follow it and use the code from the site to make it work in your code. The goal is to have the sky box reflect on the sphere, to give the impression of the sphere's surface being polished metal (i.e., act like a perfect mirror). | The [http://learnopengl.com/#!Advanced-OpenGL/Cubemaps Cube map tutorial] explains how environment mapping is done with a sky box as the environment. Feel free to follow it and use the code from the site to make it work in your code. The goal is to have the sky box reflect on the sphere, to give the impression of the sphere's surface being polished metal (i.e., act like a perfect mirror). | ||
| − | + | Here is an example of a sphere with environment mapping in a sky box: | |
| + | |||
| + | [[Image:DiscoballF20.jpg|x200px]] | ||
'''Grading:''' | '''Grading:''' | ||
* -10 if reflection looks somewhat like the skybox but is off by a lot | * -10 if reflection looks somewhat like the skybox but is off by a lot | ||
| − | * -5 if reflection is upside down but | + | * -5 if reflection is upside down but otherwise correct |
| − | ==Scene Graph Engine (Points)== | + | ==3. Scene Graph Engine (25 Points)== |
| − | To create a | + | To create a ride with multiple moving parts, we need to first implement a simple scene graph structure for our rendering engine. This scene graph should consist of at least three nodes: <tt>Node</tt> (5 points), <tt>Transform</tt> (10 points) and <tt>Geometry</tt> (10 points). You are free to add more scene graph node types as you see fit. |
* Class <tt>Node</tt> should be abstract and serve as the common base class. It should implement the following class methods: | * Class <tt>Node</tt> should be abstract and serve as the common base class. It should implement the following class methods: | ||
| Line 92: | Line 102: | ||
** have a class method which draws the 3D model associated with this node. | ** have a class method which draws the 3D model associated with this node. | ||
| − | == | + | ==4. Ride Design (25 Points)== |
| − | Now that we have the scene graph classes, it is time to put them to work. Build your own | + | Now that we have the scene graph classes, it is time to put them to work. Build your own amusement park ride using the <tt>addChild</tt> methods. |
| − | + | Your design needs to include the following features: | |
| − | + | * You need to have a ground plane for the ride. | |
| − | + | * The ride must be anchored to the ground plane (can't be floating in space). | |
| − | + | * Your disco ball sphere must be part of the design. It can occur once or multiple times. | |
| − | + | * Your hierarchy needs to be at least '''three''' levels deep. For instance a ferris wheel which spins around its center with cars that rotate so they are always aligned with gravity, with the cars rotating about their vertical axis (see first picture below). | |
| − | + | * Drawing the same object multiple times in different positions, orientations, and/or with different scaling factors. | |
| + | * Moving objects over time, including rotations not centered at the origin, linear motion (changing direction at the end points) and compound motions. | ||
| + | * Use regular Phong shading as in project 2 for the surfaces of all your ride geometries. This means that you need to have correct normals for all your 3D objects. | ||
| + | * Implement at least one directional or point light source for your scene, and make sure that all surfaces are illuminated correctly. (Ideally, you use your lighting environment from project 2 which would also allow you to move your light source around with the mouse, but this is not a requirement.) | ||
| − | + | Adequate results can be achieved with simple cubes, cones, cylinders and spheres. More complex objects are not required for this simulation, but you can get extra credit for them. Below are a few links to basic 3D shapes you can use. You are also allowed to use the OBJ files from projects 1 and 2. | |
| − | + | ||
| − | + | ||
| − | + | ||
| − | + | ||
| − | + | ||
| − | + | * [[Media:CubeOBJ.zip|Cube]] | |
| + | * [[Media:ConeOBJ.zip|Cone]] | ||
| + | * [[Media:CylinderOBJ.zip|Cylinder]] | ||
| + | * Sphere: [[Media:TriSphereOBJ.zip|triangles, no texture coordinates)]], [[Media:TexSphereOBJ.zip|quads with texture coordinates]] | ||
| + | * Torus: [[Media:TorusLR_OBJ.zip|low polygon count]], [[Media:TorusHR_OBJ.zip|high polygon count]], [[Media:TorusThin_OBJ.zip|thin torus]] | ||
| + | * [[Media:TeapotOBJ.zip|Utah Teapot]] | ||
| − | + | Here a few examples of rides (but yours needs to have a sky box and a disco ball also): | |
| − | + | [[Image:Ride3F20.jpg|x200px]] | |
| + | [[Image:FerrisWheel.png|x200px]] | ||
| + | [[Image:RideF20.jpg|x200px]] | ||
| + | [[Image:Ride2F20.jpg|x200px]] | ||
| + | [[Image:Carousel.png|x200px]] | ||
Once you've created your scene graph, you need to get your rendering engine ready to recursively traverse the scene graph for rendering by creating a root node of type <tt>Transform</tt> and calling its <tt>draw()</tt> function with the identity matrix as its parameter. | Once you've created your scene graph, you need to get your rendering engine ready to recursively traverse the scene graph for rendering by creating a root node of type <tt>Transform</tt> and calling its <tt>draw()</tt> function with the identity matrix as its parameter. | ||
| − | + | '''Grading:''' | |
| + | * -3 if no ground plane or ride not anchored to ground | ||
| + | * -5 if disco ball is missing | ||
| + | * -3 per missing hierarchy level (3 levels required) | ||
| + | * -5 for lighting problems (no light source, no Phong shading, incorrect normals, etc) | ||
| − | == | + | ==5. Animation and Interaction (10 Points)== |
| + | |||
| + | * Animate your amusement park ride to make it look like it would when it is running, by changing the matrices in the <tt>Transform</tt> nodes. | ||
| + | * Allow the user to start/stop the animation of each of the levels of your motion hierarchy separately. (For example: if you're making a ferris wheel: the '1' key starts/stops the rotation of the ferris wheel itself, the '2' key starts/stops the rotation of the cars around the horizontal axis to keep them level with the ground, the '3' key starts/stops the rotation of the cars about their vertical axis.) | ||
| + | * Give the user keyboard or mouse control to move around within the simulation (by moving the camera): the user needs to be able to move forward, back, up or down, as well as turn left or right. The up vector of the camera should always point straight up in the world (no banking or pitching the view). | ||
| + | |||
| + | '''Grading:''' | ||
| + | * -5 if ride is not animated | ||
| + | * -5 if motion on hierarchy levels can't independently be started/stopped | ||
| + | * -5 if user can't move around the simulation (-2 if only rotations are missing) | ||
| − | + | ==6. Extra Credit (Up to 10 Points Max.)== | |
| − | + | Choose from the following options. The points add up to a maximum of 10 points. | |
| − | + | # Create a camera node and attach it to one of the leaf nodes of your scene graph, for instance showing a rider's view. Allow switching between this view and the default observer view with a keyboard key. (3 points) | |
| + | # Create a custom cube map for your sky box using your smartphone in 360 degree panorama capture mode, or a dedicated 360 degree panorama camera. [https://aerotwist.com/tutorials/create-your-own-environment-maps/ This tutorial] might be useful. (5 points) | ||
| + | # Create a custom, non-trivial object (not a basic mathematical shape or derived from one) with a 3D modeling tool (e.g., Blender), or find a free model on the internet which you add to your amusement park scene. It needs to be textured, have normal vectors, and you need to render it with Phong shading. (5 points) | ||
| + | # Dynanmic environment mapping: have the disco ball reflect not just the sky box, but also all the components of your ride. (10 points) | ||
| − | |||
| − | + | =='''Submission Instructions'''== | |
| − | + | ||
| − | + | ||
| − | + | ||
| − | + | Once you are done with the homework project, record a video demonstrating all the functionality you have implemented. | |
| − | + | The video should be '''no longer than 5 minutes''', and can be substantially shorter. | |
| − | + | Ideally, you will talk over the video to explain what you are showing. Alternatively, you can display text for this purpose. | |
| − | + | To create the video you don't need to use video editing software, but you should use software to capture your screen to a video file. | |
| − | * | + | * For Windows users we recommend the free [https://obsproject.com/ OBS Studio]. |
| − | * | + | * On Macs you can use Quicktime to record off the screen. |
| − | + | ||
| − | + | ||
| − | + | ||
| − | + | If this does not work for you, you can hold your phone in front of the screen and record with a steady hand. | |
| − | + | ||
| − | + | Upload this video at the Assignment link on Canvas, and comment which functionality you have or have not implemented and what extra credit you have implemented. If you couldn't implement something in its entirety, please state which parts you did implement and hope to get points for. | |
| − | * | + | * Example 1: I've done the base project with no issues. No extra credit. |
| + | * Example 2: Everything works except an issue with '''x''', I couldn't get '''y''' to work properly. | ||
| + | * Example 3: Sections 1-2 and 4 work. | ||
| + | * Example 4: The base project is complete and I did '''z''' for extra credit. | ||
| − | + | Finally, zip up your source code (.cpp, .h, executable and shader files, as well as '''any .obj files which were not provided to you''') and submit the zip file at the Assignment link on Canvas as well. | |
Latest revision as of 20:15, 13 December 2020
Contents |
Project 3: Amusement Park Ride
In this project you will need to implement a scene graph to render an amusement park ride which consists of a number of objects that are part of a hierarchy.
This project implements the following skills from the lectures:
- texturing
- sky box
- environment mapping
- scene graph
The user of your program should be able to control a variety of options within your simulation using the keyboard. You may choose which keys control which functions, but make sure they are clearly documented in either a text file named README.txt which you add to the main directory of your code, or in your video (narration or text overlays). The following interactive controls should be available to the user:
- Start/stop the animation of each of the levels of your motion hierarchy separately.
- Move around within the simulation (by moving the camera): forward, back, up or down, as well as turn the camera left or right (which affects subsequent forward movements).
The total score for this project is 100 points. Additionally, you can obtain up to 10 points of extra credit.
There will not be a discussion on November 11th because of Veterans Day. Instead, this project will be introduced in lecture on Tuesday, November 10th.
We recommend starting with your code from project 2 and removing the rendering of the 3D models. In this project you are going to render all new objects, using your own implementation of a scene graph.
1. Sky Box (20 Points)
Create a sky box for your scene, to give it a nice background. LearnOpenGL offers a great tutorial for sky boxes and how to implement them in modern OpenGL.
Make sure the width and height of your sky box textures are powers of two, we recommend 512x512 pixels. You are allowed to create your own sky box if you want, many smartphones can capture 360 degree panorama images which you would need to turn into a cube map. If you would rather use ready-made sky boxes from the internet, here a few pointers:
- http://www.f-lohmueller.de/pov_tut/skyboxer/skyboxer_3.htm (offline link)
- https://opengameart.org/content/elyvisions-skyboxes (offline link)
- These are lower resolution and need to be split up into the individual cube faces.
- These are very nice but need to be re-projected into cube maps (see below).
If you created or downloaded a panorama image from the web, you need to convert it into the six cube map faces you need for the sky box. This web tool can do this for you.
Once you created or downloaded your sky box textures, use them to create a sky box by texturing the insides of a very large cube (coordinates from about -500 to +500). Make sure that the textures align correctly at the edges - if not you may need to rotate or flip some of the textures.
Use single-sided rendering, so that OpenGL will automatically hide the user-facing sides of the cube. If your sky box is defined with the triangles' normals facing outward (like the example in the discussion slides), use the following code lines to ensure that the user will never see the outside of the box:
glEnable(GL_CULL_FACE);
glCullFace(GL_FRONT);
If your normals point inward, you need to use GL_BACK instead of GL_FRONT in the above code.
Use the following settings for your texture after your first glBindTexture(GL_TEXTURE_CUBE_MAP, id) for correct lighting and filtering settings:
  // Make sure no bytes are padded:
  glPixelStorei(GL_UNPACK_ALIGNMENT, 1);

  // Use bilinear interpolation:
  glTexParameteri(GL_TEXTURE_CUBE_MAP, GL_TEXTURE_MIN_FILTER, GL_LINEAR);
  glTexParameteri(GL_TEXTURE_CUBE_MAP, GL_TEXTURE_MAG_FILTER, GL_LINEAR);

  // Use clamp to edge to hide skybox edges:
  glTexParameteri(GL_TEXTURE_CUBE_MAP, GL_TEXTURE_WRAP_S, GL_CLAMP_TO_EDGE);
  glTexParameteri(GL_TEXTURE_CUBE_MAP, GL_TEXTURE_WRAP_T, GL_CLAMP_TO_EDGE);
Grading:
- -5 if sky box works but is not seamless
- -3 if backface culling is not enabled, or it is enabled but the wrong faces are culled
2. Environment Mapping (20 Points)
Create an algorithm to tessellate a disco ball style sphere (ie, create vertices and normals for a sphere with a relatively low number of quads for faces). Its surface should look like polished metal, so you need to use environment mapping on it.
This sphere needs to become part of your amusement park ride later, but we recommend implementing it beforehand so that you can test it out separately. Unless you don't get to render the ride, you don't need to show this sphere separately in your demo (although you could).
We provide code for the sphere geometry for Windows and for Mac. But feel free to write your own.
The Cube map tutorial explains how environment mapping is done with a sky box as the environment. Feel free to follow it and use the code from the site to make it work in your code. The goal is to have the sky box reflect on the sphere, to give the impression of the sphere's surface being polished metal (i.e., act like a perfect mirror).
Here is an example of a sphere with environment mapping in a sky box:
Grading:
- -10 if reflection looks somewhat like the skybox but is off by a lot
- -5 if reflection is upside down but otherwise correct
3. Scene Graph Engine (25 Points)
To create a ride with multiple moving parts, we need to first implement a simple scene graph structure for our rendering engine. This scene graph should consist of at least three nodes: Node (5 points), Transform (10 points) and Geometry (10 points). You are free to add more scene graph node types as you see fit.
- Class Node should be abstract and serve as the common base class. It should implement the following class methods:
- an abstract draw method: virtual void draw(Matrix4 C)=0
- an abstract virtual void update()=0 method to separate bounding sphere updates from rendering
- Transform should be derived from Node and have the following features:
- store a 4x4 transformation matrix M
- store a list of pointers to child nodes (std::list<Node*>)
- provide a class methods to add a child node (addChild()) to the list
- its draw method needs to traverse the list of children and call each child node's draw function
- when draw(C) is called, multiply matrix M with matrix C.
- Geometry should be derived from Node and have the following features:
- set the modelview matrix to the current C matrix
- an initialization method to load a 3D model (OBJ file) whose filename is passed to it (init(string filename). Your OBJ loader from project 2 should work.
- have a class method which draws the 3D model associated with this node.
4. Ride Design (25 Points)
Now that we have the scene graph classes, it is time to put them to work. Build your own amusement park ride using the addChild methods.
Your design needs to include the following features:
- You need to have a ground plane for the ride.
- The ride must be anchored to the ground plane (can't be floating in space).
- Your disco ball sphere must be part of the design. It can occur once or multiple times.
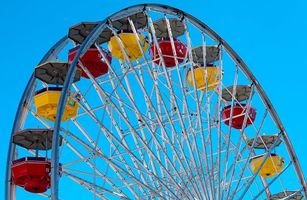
- Your hierarchy needs to be at least three levels deep. For instance a ferris wheel which spins around its center with cars that rotate so they are always aligned with gravity, with the cars rotating about their vertical axis (see first picture below).
- Drawing the same object multiple times in different positions, orientations, and/or with different scaling factors.
- Moving objects over time, including rotations not centered at the origin, linear motion (changing direction at the end points) and compound motions.
- Use regular Phong shading as in project 2 for the surfaces of all your ride geometries. This means that you need to have correct normals for all your 3D objects.
- Implement at least one directional or point light source for your scene, and make sure that all surfaces are illuminated correctly. (Ideally, you use your lighting environment from project 2 which would also allow you to move your light source around with the mouse, but this is not a requirement.)
Adequate results can be achieved with simple cubes, cones, cylinders and spheres. More complex objects are not required for this simulation, but you can get extra credit for them. Below are a few links to basic 3D shapes you can use. You are also allowed to use the OBJ files from projects 1 and 2.
- Cube
- Cone
- Cylinder
- Sphere: triangles, no texture coordinates), quads with texture coordinates
- Torus: low polygon count, high polygon count, thin torus
- Utah Teapot
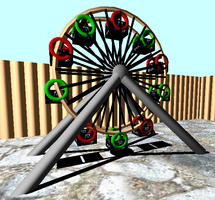
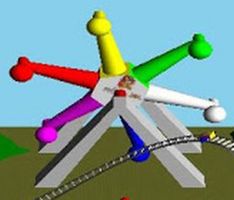
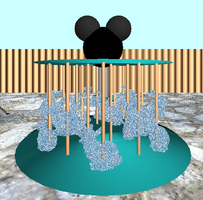
Here a few examples of rides (but yours needs to have a sky box and a disco ball also):
Once you've created your scene graph, you need to get your rendering engine ready to recursively traverse the scene graph for rendering by creating a root node of type Transform and calling its draw() function with the identity matrix as its parameter.
Grading:
- -3 if no ground plane or ride not anchored to ground
- -5 if disco ball is missing
- -3 per missing hierarchy level (3 levels required)
- -5 for lighting problems (no light source, no Phong shading, incorrect normals, etc)
5. Animation and Interaction (10 Points)
- Animate your amusement park ride to make it look like it would when it is running, by changing the matrices in the Transform nodes.
- Allow the user to start/stop the animation of each of the levels of your motion hierarchy separately. (For example: if you're making a ferris wheel: the '1' key starts/stops the rotation of the ferris wheel itself, the '2' key starts/stops the rotation of the cars around the horizontal axis to keep them level with the ground, the '3' key starts/stops the rotation of the cars about their vertical axis.)
- Give the user keyboard or mouse control to move around within the simulation (by moving the camera): the user needs to be able to move forward, back, up or down, as well as turn left or right. The up vector of the camera should always point straight up in the world (no banking or pitching the view).
Grading:
- -5 if ride is not animated
- -5 if motion on hierarchy levels can't independently be started/stopped
- -5 if user can't move around the simulation (-2 if only rotations are missing)
6. Extra Credit (Up to 10 Points Max.)
Choose from the following options. The points add up to a maximum of 10 points.
- Create a camera node and attach it to one of the leaf nodes of your scene graph, for instance showing a rider's view. Allow switching between this view and the default observer view with a keyboard key. (3 points)
- Create a custom cube map for your sky box using your smartphone in 360 degree panorama capture mode, or a dedicated 360 degree panorama camera. This tutorial might be useful. (5 points)
- Create a custom, non-trivial object (not a basic mathematical shape or derived from one) with a 3D modeling tool (e.g., Blender), or find a free model on the internet which you add to your amusement park scene. It needs to be textured, have normal vectors, and you need to render it with Phong shading. (5 points)
- Dynanmic environment mapping: have the disco ball reflect not just the sky box, but also all the components of your ride. (10 points)
Submission Instructions
Once you are done with the homework project, record a video demonstrating all the functionality you have implemented.
The video should be no longer than 5 minutes, and can be substantially shorter.
Ideally, you will talk over the video to explain what you are showing. Alternatively, you can display text for this purpose.
To create the video you don't need to use video editing software, but you should use software to capture your screen to a video file.
- For Windows users we recommend the free OBS Studio.
- On Macs you can use Quicktime to record off the screen.
If this does not work for you, you can hold your phone in front of the screen and record with a steady hand.
Upload this video at the Assignment link on Canvas, and comment which functionality you have or have not implemented and what extra credit you have implemented. If you couldn't implement something in its entirety, please state which parts you did implement and hope to get points for.
- Example 1: I've done the base project with no issues. No extra credit.
- Example 2: Everything works except an issue with x, I couldn't get y to work properly.
- Example 3: Sections 1-2 and 4 work.
- Example 4: The base project is complete and I did z for extra credit.
Finally, zip up your source code (.cpp, .h, executable and shader files, as well as any .obj files which were not provided to you) and submit the zip file at the Assignment link on Canvas as well.
